Resources
Here at uno, we know that streamers can range from beginners to pro content creators, which means that the range of control you need over our free animated stream overlays can vary too. That’s why we offer the Slots function. Slots let you handle different versions of an uno overlay in one interface! By integrating uno Slots with your Bitfocus Companion workflow, you’ll unlock even more control over complex live streams.
Bitfocus Companion allows you to use the Eglato Streamdeck as a powerful control system for broadcast equipment, AV setups, and professionally-designed overlays from uno and our parent company, Singular.live.
You can find our detailed how-to guides here:
1. Download the latest version of Bitfocus Companion and install it on your PC.
Note: if you are working on MacOS, you may have to bypass some additional security warnings. We suggest you right-click on the Companion DMG file and click Open.
2. A small control window should open. Click the “Launch GUI” button.
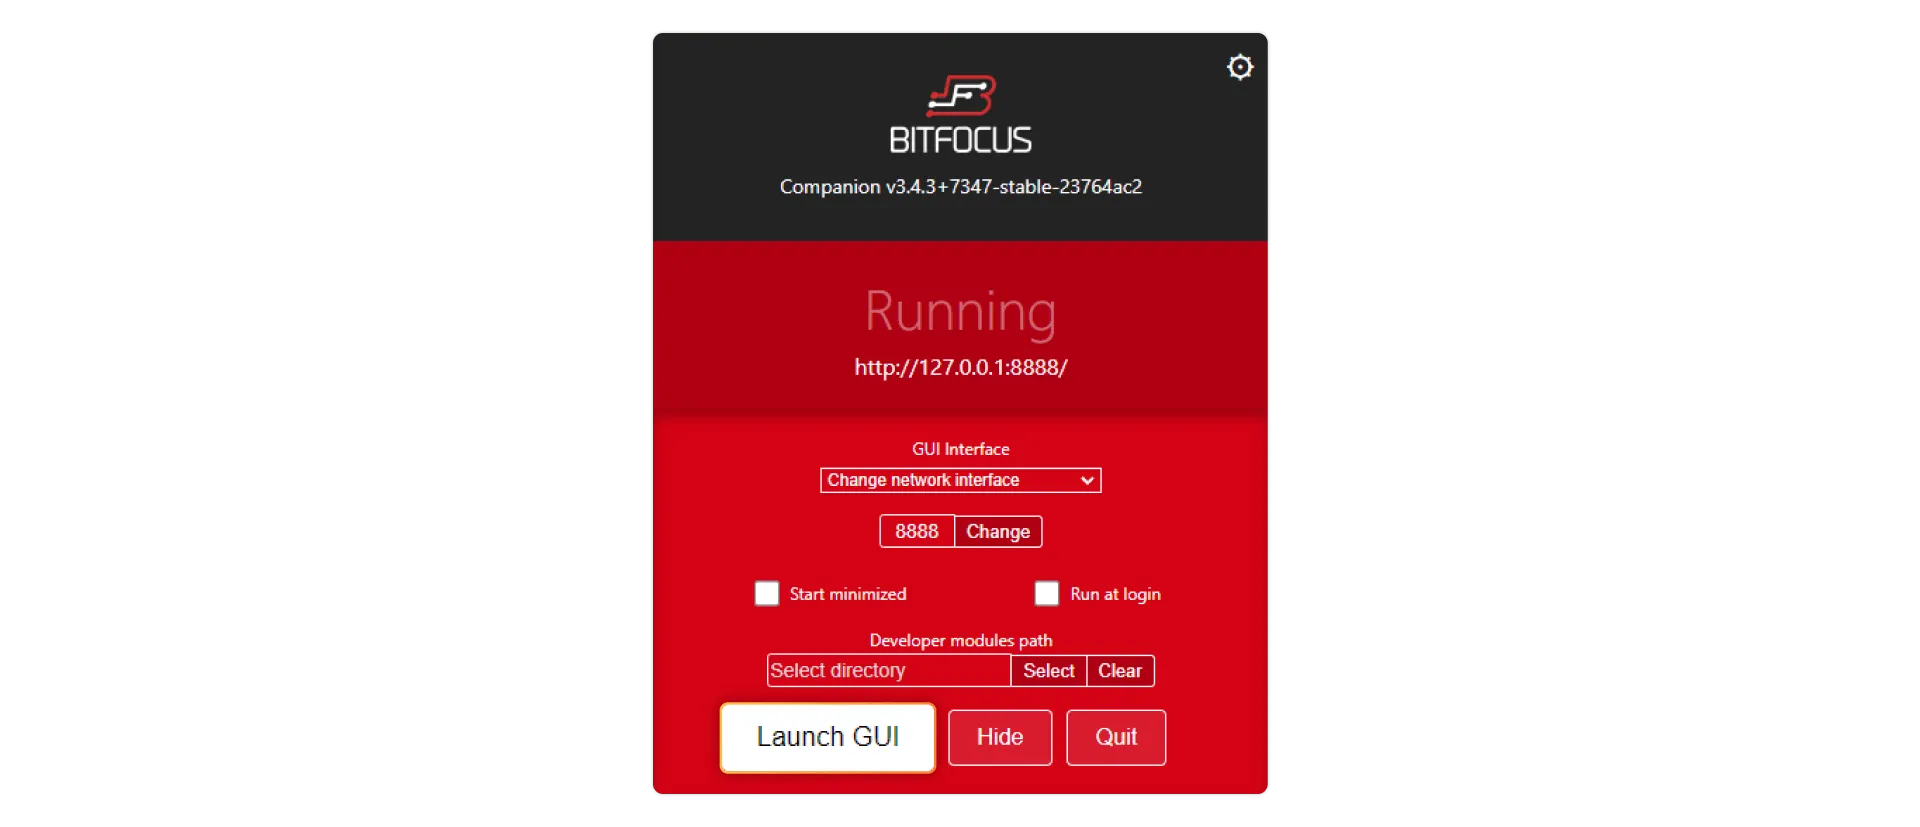
Now you can set up the REST API by adding the Generic HTTP Requests Connection.
3. Make sure you are in the Connections tab in Bitfocus Companion. Under the +Add Connection tab, type Generic HTTP into the search bar. Then, click the “Add” button.

4. Configure the connection and make sure the Label is something you’ll recognize later.

Note: You can leave the Base URL field empty for now. You can define REST endpoints later when you define buttons.
4. The Singular-API connection should appear under your Connections tab. Enable the HTTPS connector by clicking on the toggle next to the Singular-API connection.

To use Bitfocus Companion with uno Slots, you’ll need to find the unique API for the uno overlay you want to use, locate the ID and overlay you want to control, and the details for the uno slots that you want to trigger. Here’s how to set that up on Companion.
All Uno App APIs use the PUT HTTP method without authentication.
In this guide, we’re using the Pyrite-themed Stream Pack. However, if you’re just starting out and want to test this tutorial out first, you can also use these URLs for testing:
If you’re signed into your account on overlays.uno, this is how you can find the Uno App API URL:
1. Go to My Overlays and double-click the overlay that you want to use to open up its interface.
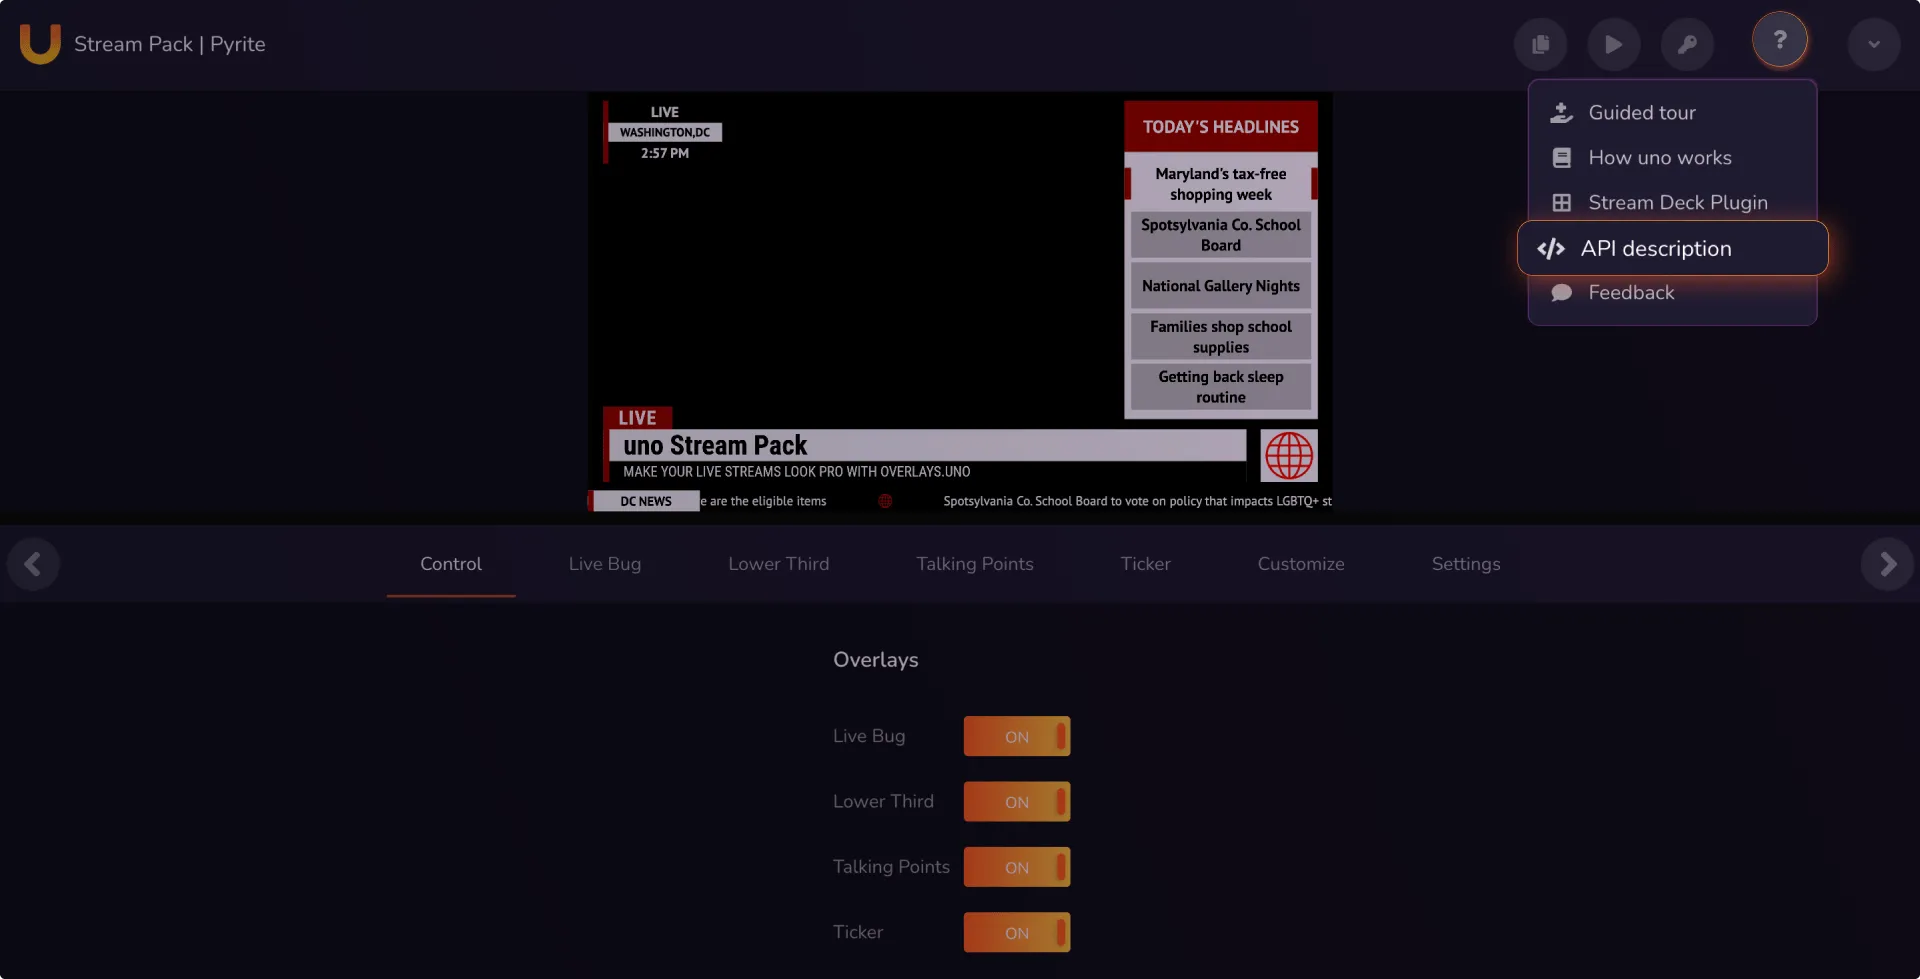
2. Click on the “?” icon, then click on “API Description” on the dropdown menu that appears. This allows you access a comprehensive overview of the overlay’s API capabilities.
3. Locate the API endpoint.
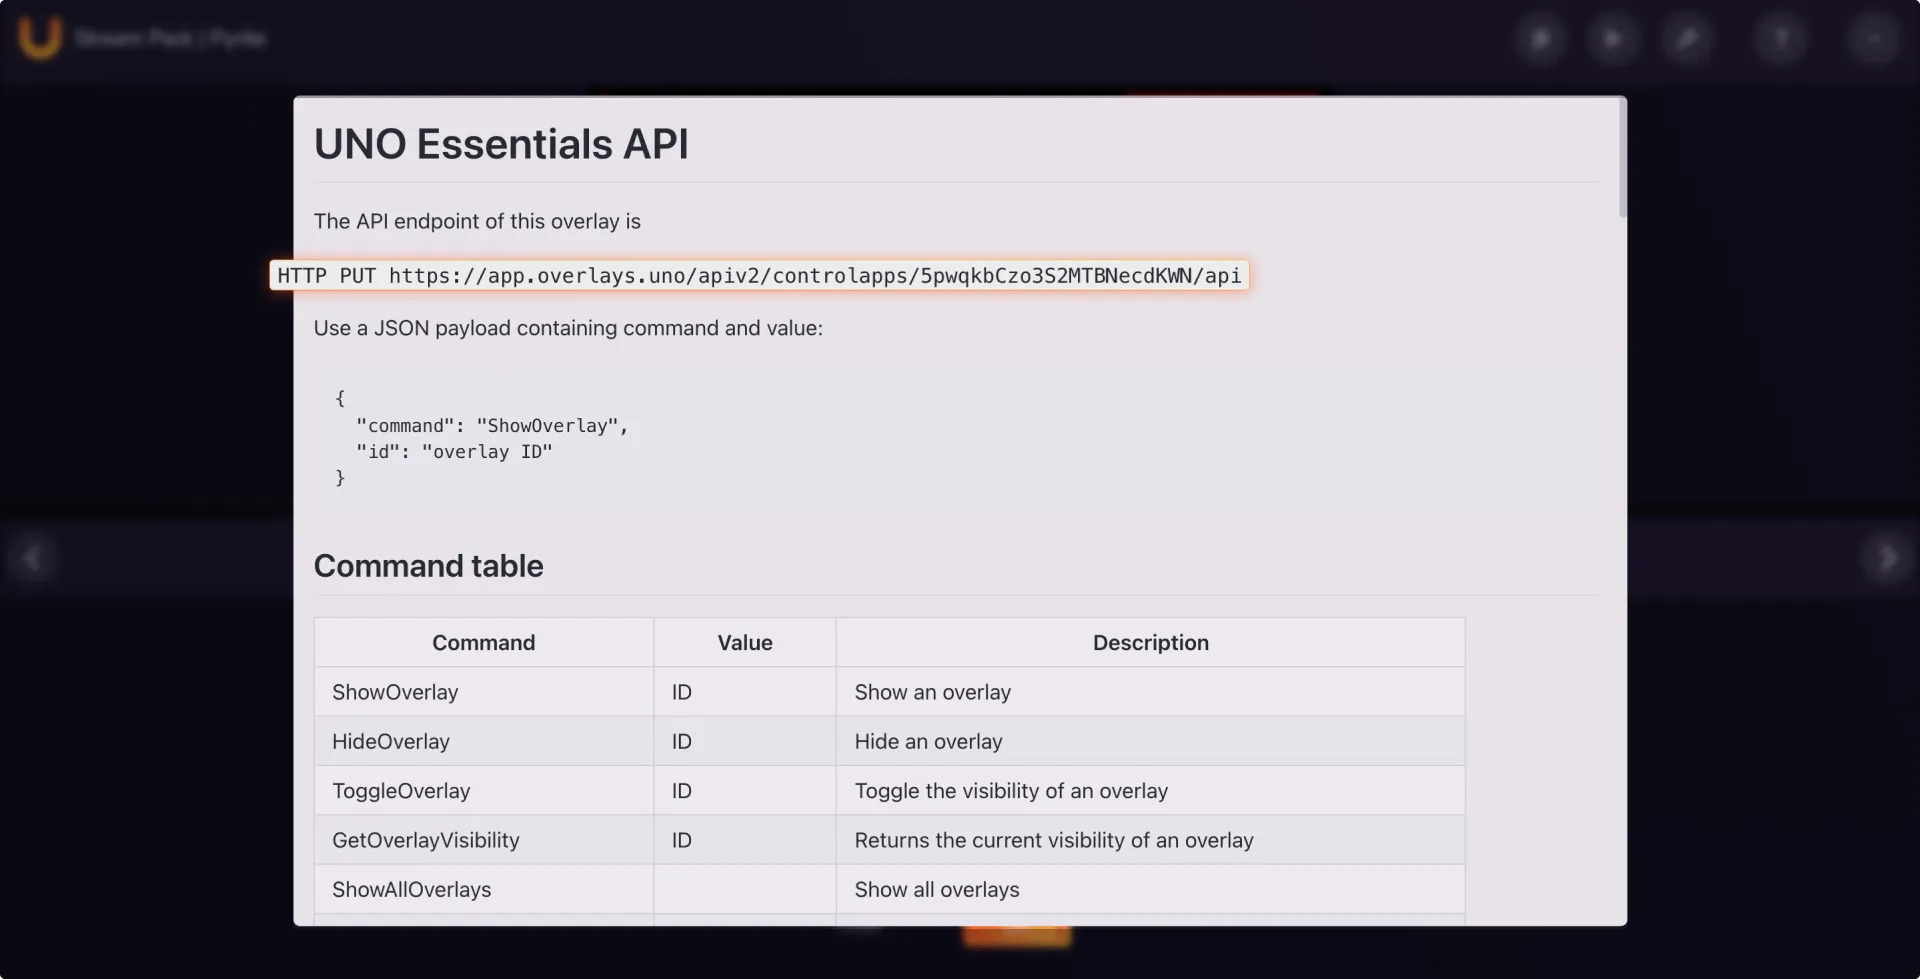
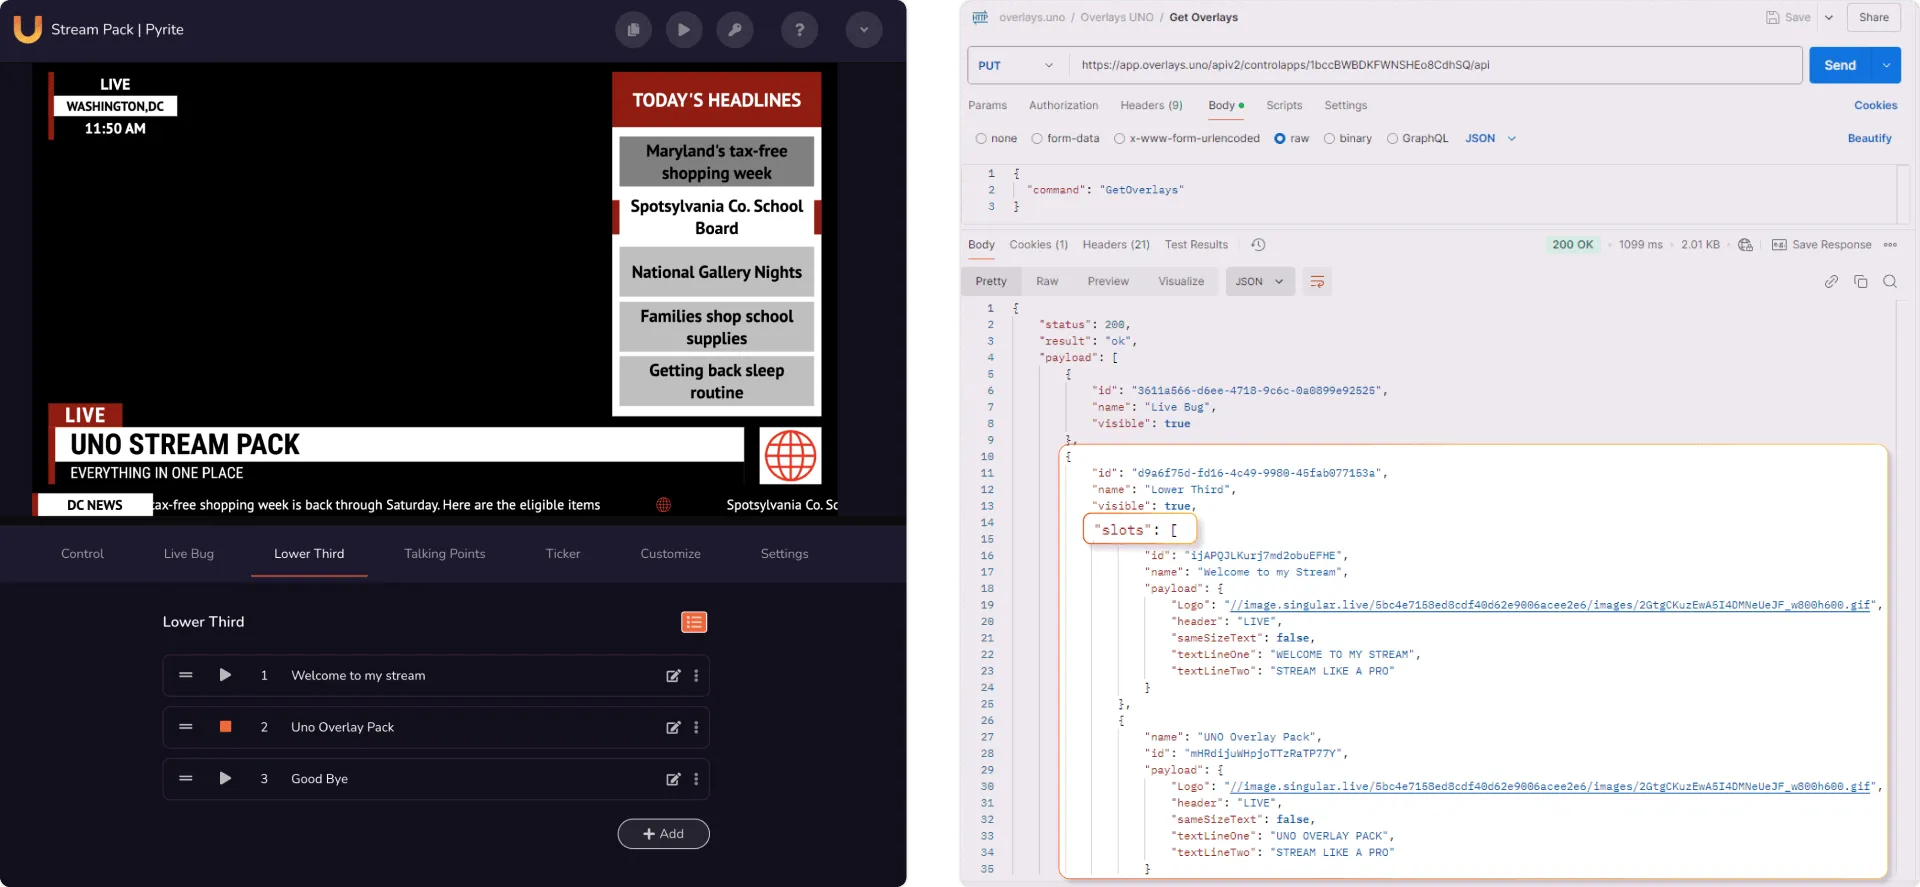
You can locate an overlay and its various details, compositions and subcompositions, and send requests using Postman REST Client. If slots are activated for an overlay, the JSON structure will include an array with the slots details.
To find an overlays’ ID, first locate its name. For example, if you want to control different functions in the talking points, you need to identify the subcomposition with"name": "Talking Points" and find the value next to "id".
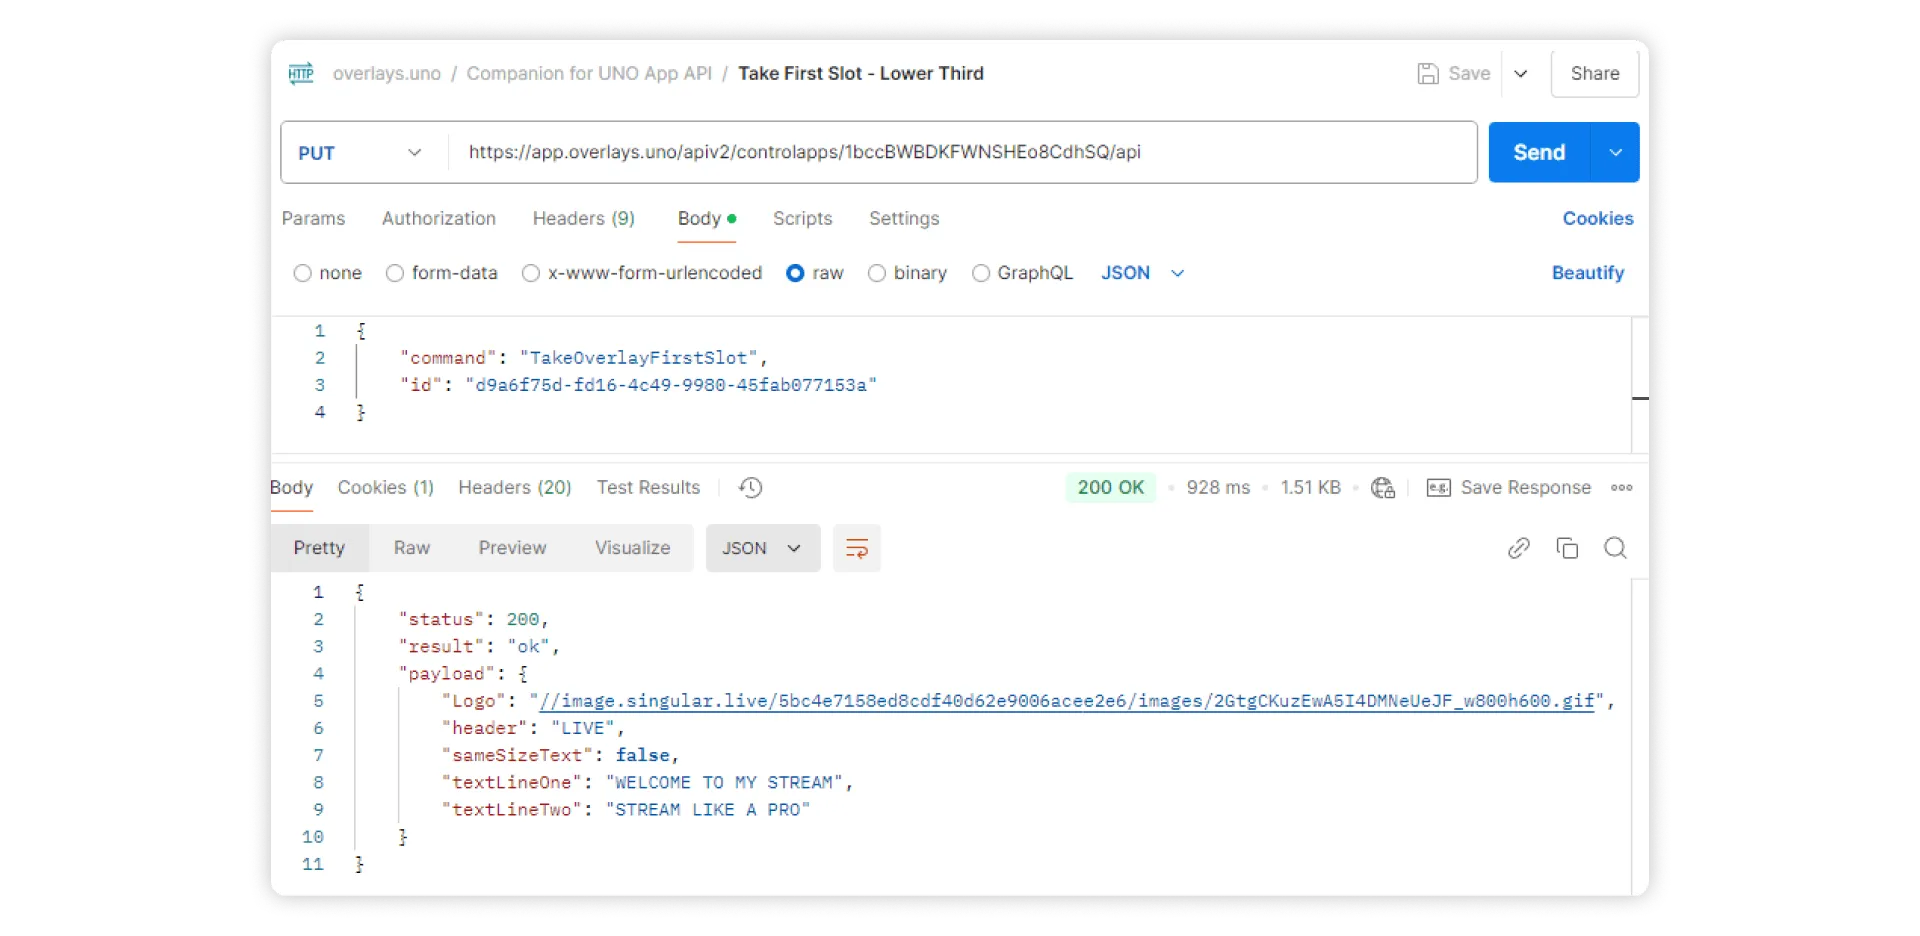
Here are some examples of how to swap between different slots for the Lower Third overlay in the Pyrite-themed Stream Pack.
1. Request method : PUT
2. Request URL: https://app.overlays.uno/apiv2/controlapps/1bccBWBDKFWNSHEo8CdhSQ/api
3. Request body:
    {
            "command": "TakeOverlayFirstSlot"
	"id" :  "paste the overlay id here"
     }
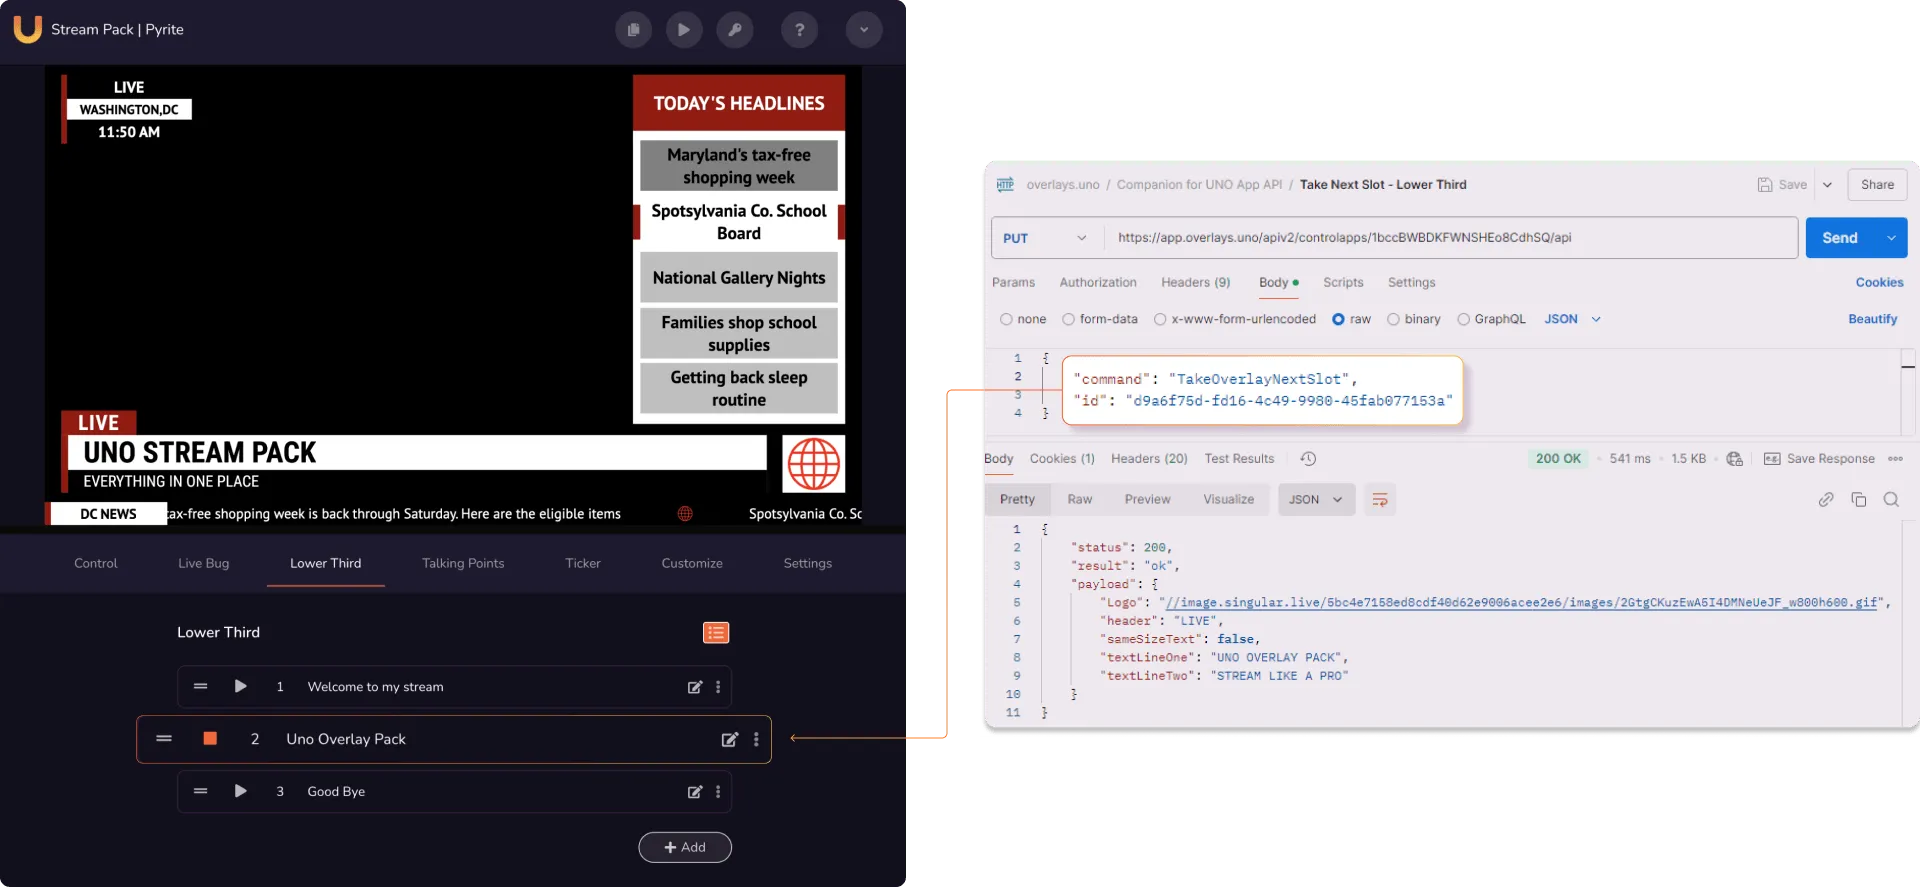
1. Request method : PUT
2. Request URL: https://app.overlays.uno/apiv2/controlapps/1bccBWBDKFWNSHEo8CdhSQ/api
3. Request body:
    {
            "command": "TakeOverlayNextSlot"
	"id" :  "paste the overlay id here"
     }
1. Request method : PUT
2. Request URL: https://app.overlays.uno/apiv2/controlapps/1bccBWBDKFWNSHEo8CdhSQ/api
3. Request body:
    {
            "command": "TakeOverlayPreviousSlot"
	"id" :  "paste the overlay id here"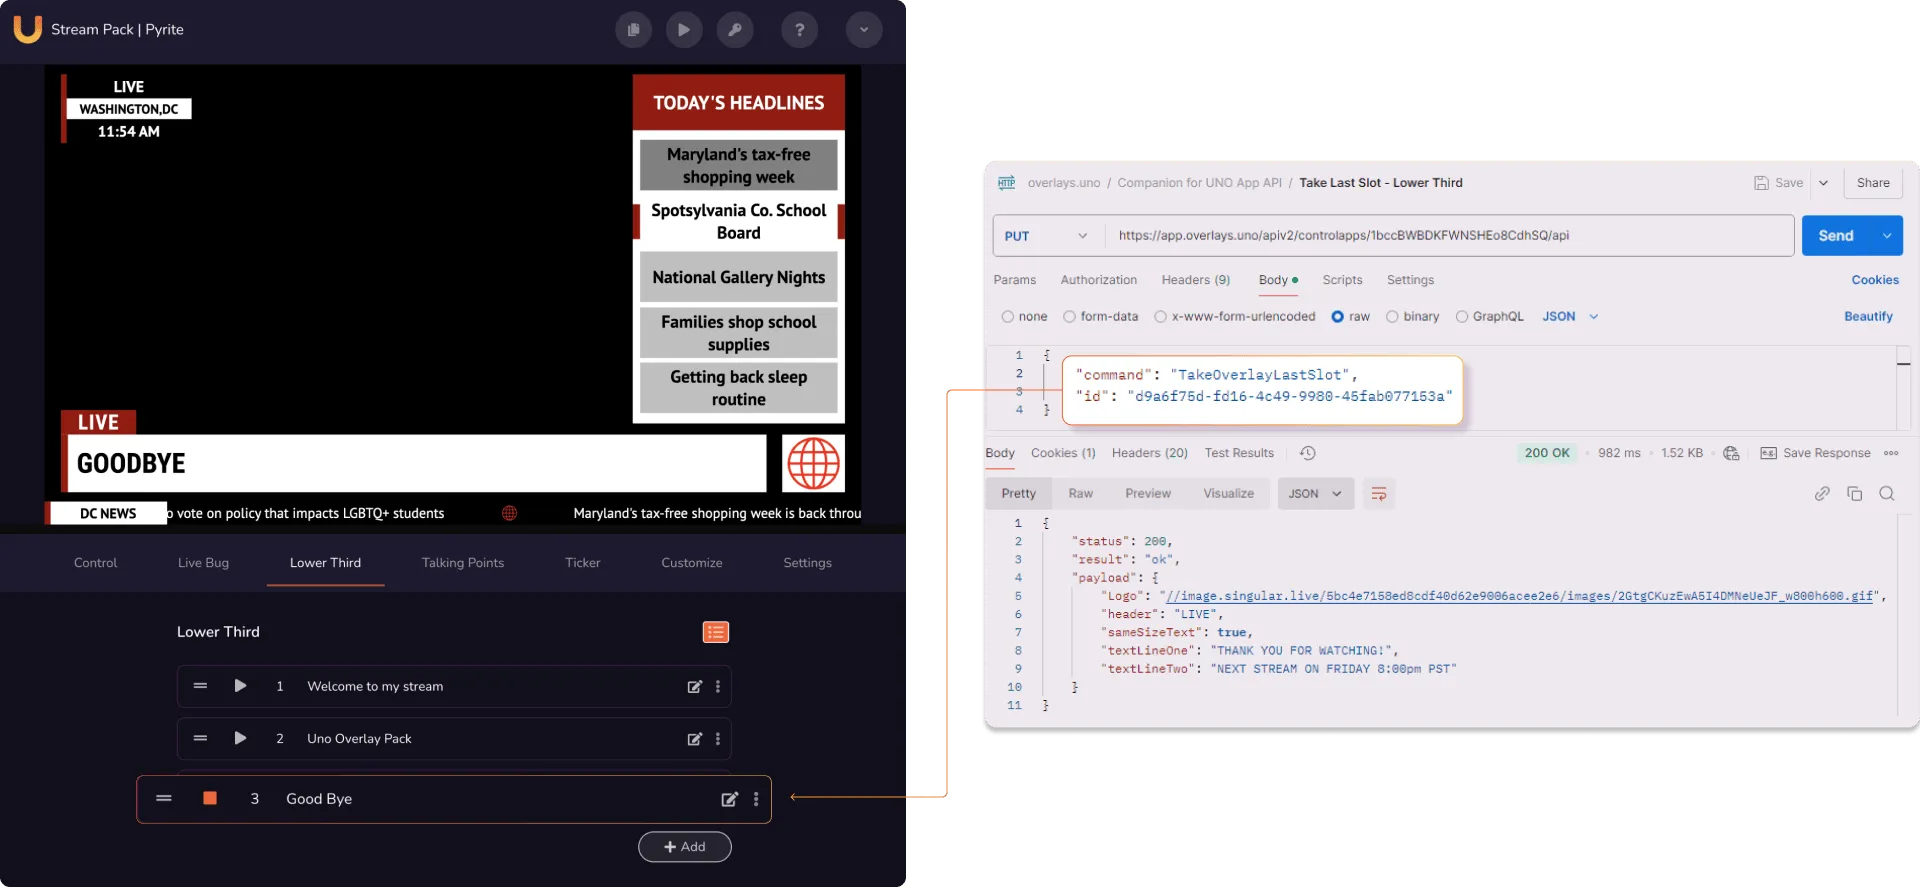
}1. Request method : PUT
2. Request URL: https://app.overlays.uno/apiv2/controlapps/1bccBWBDKFWNSHEo8CdhSQ/api
3. Request body:
    {
            "command": "TakeOverlayLastSlot"
	"id" :  "paste the overlay id here"
     }
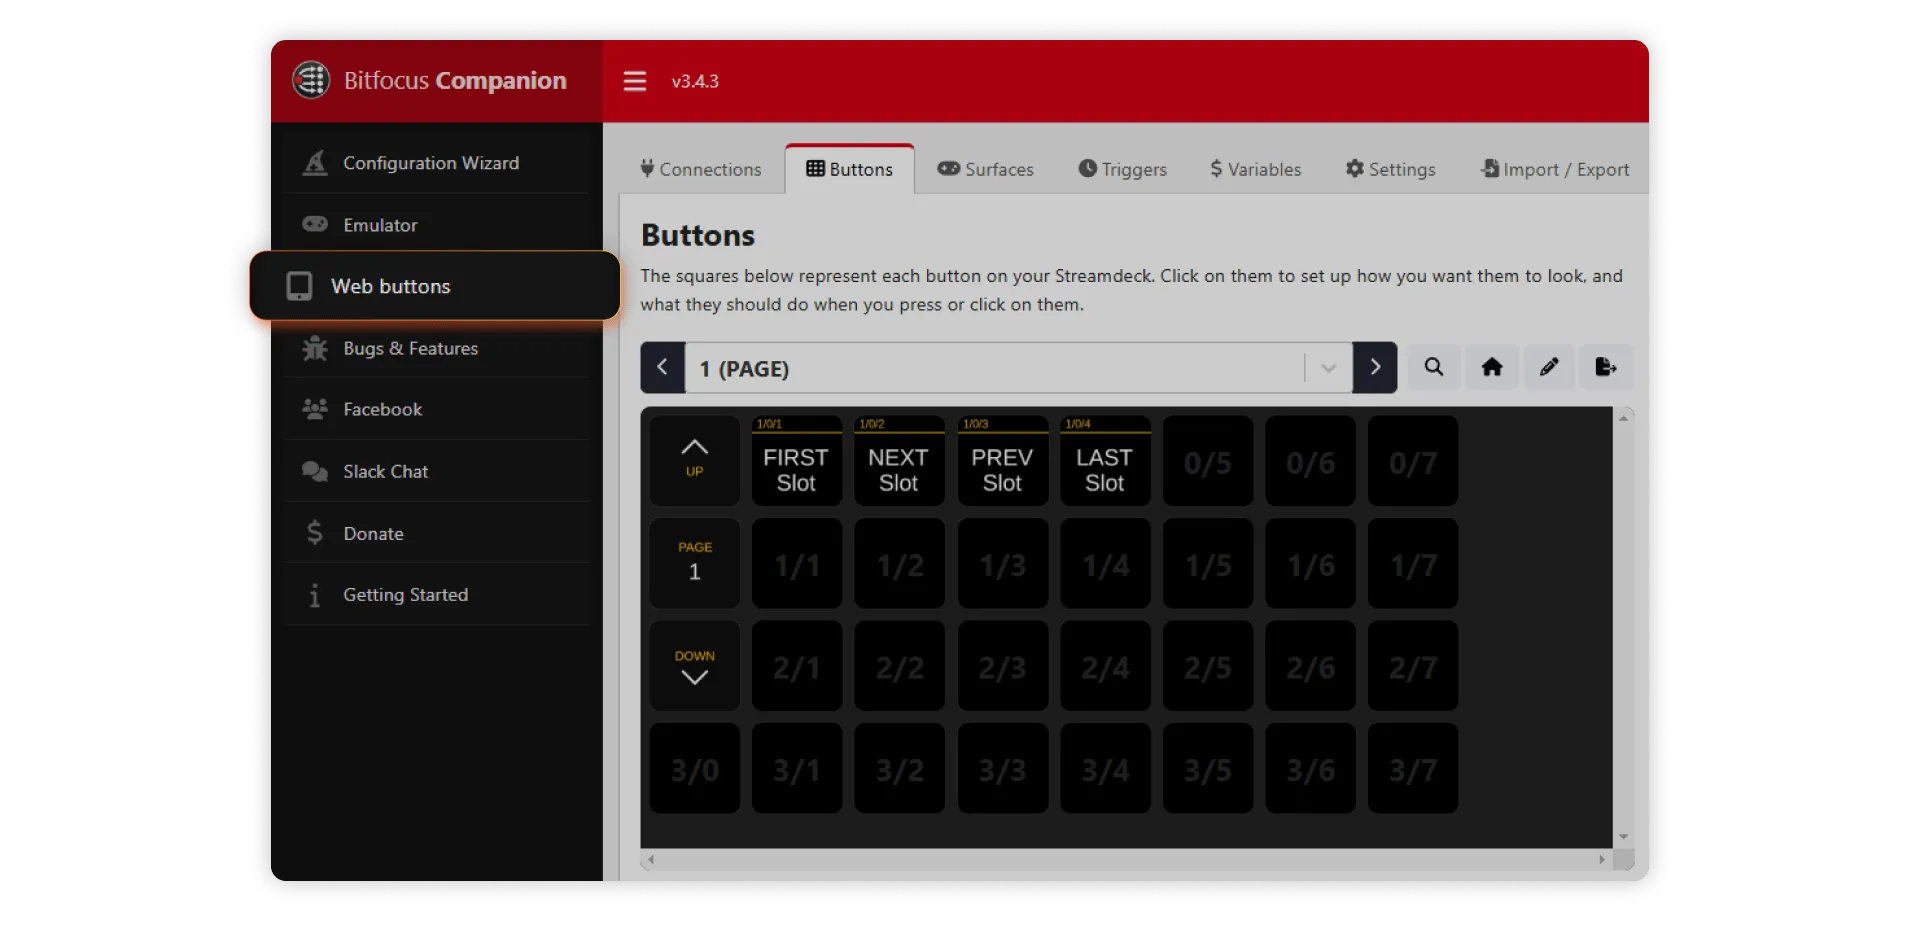
1. Click on Buttons in the top menu tab to navigate to your buttons, then click on a square in the panel to select and edit a button.
2. Open the Action Browser by clicking on the file icon under “Press Actions”.
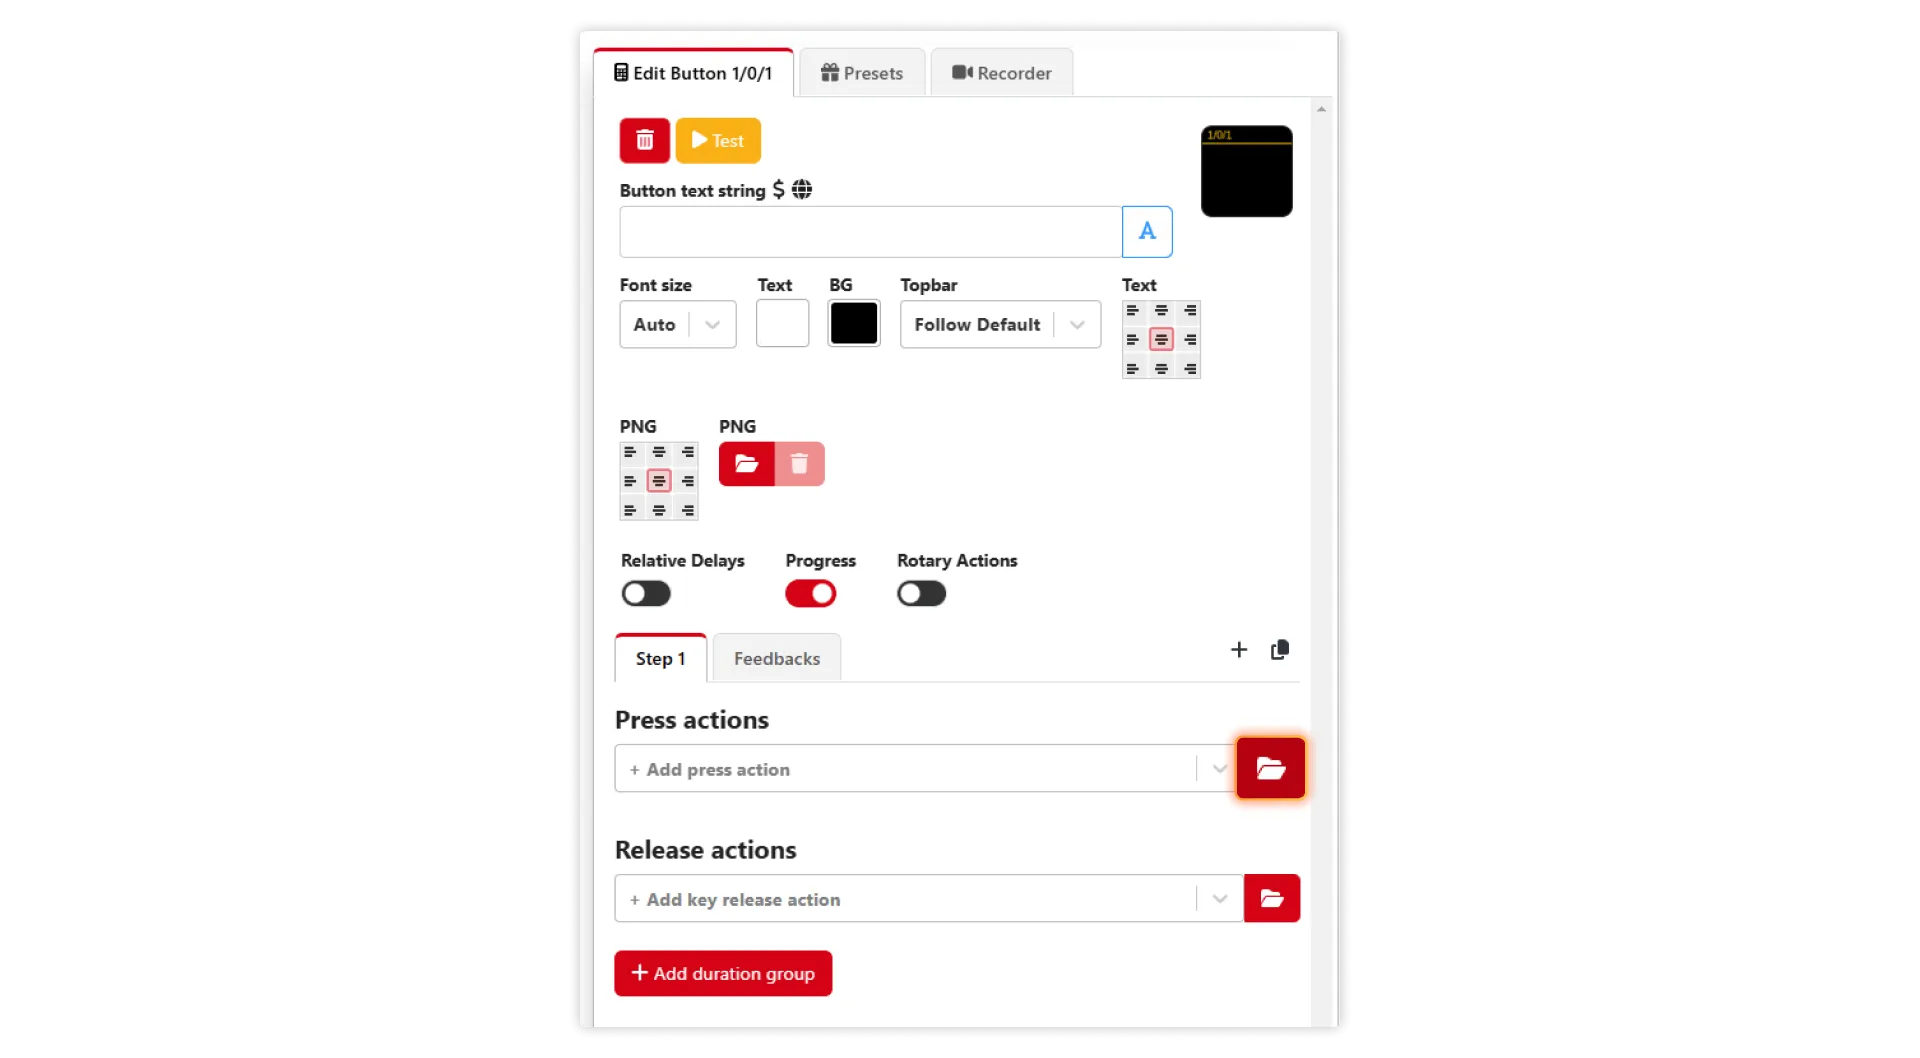
3. Select PUT method from the dropdown menu.

4. Define the PUT request to choose the lower third’s first slot:
{"command":"TakeOverlayFirstSlot","id":"d9a6f75d-fd16-4c49-9980-45fab077153a"}
5. Add a button in Bitfocus Companion to move to the lower third’s next slot by repeating 1-3 in this section, then defining the PATCH request with the following:
{"command":"TakeOverlayNextSlot","id":"d9a6f75d-fd16-4c49-9980-45fab077153a"}6. Add a button in Bitfocus Companion to move to the lower third’s previous slot by repeating 1-3 in this section, then defining the PATCH request with the following:
{"command":"TakeOverlayPreviousSlot","id":"d9a6f75d-fd16-4c49-9980-45fab077153a"}7. Add a button in Bitfocus Companion to choose the lower third’s last slot by repeating 1-3 in this section, then defining the PATCH request with the following:
{"command":"TakeOverlayLastSlot","id":"d9a6f75d-fd16-4c49-9980-45fab077153a"}This should give you a base guideline on how to swap between slots of any uno overlay.
You can check if your setup works properly by clicking on the Web buttons view the menu on the left of your screen.
If you have any questions about using Bitfocus Companion Stream Deck with overlays.uno, don’t stress! You can get tips and help from our team and our community of pro streamers in the #support channel on our official Discord channel.

