Resources
As a free, open source streaming software, OBS (Open Broadcaster Software) is one of the most popular tools for most streamers. However, for those of you creating your first layouts for OBS, the interface might seem intimidating. Here’s our guide on how to create your first stream layout for OBS.
Before you start setting up a stream layout OBS source or doing anything technical, the most important thing to know is why and what you’ll be streaming. This is arguably more important than choosing your streaming platform, because OBS already allows you to stream on multiple platforms.
Your content determines your layout and sources. For a podcast, you might want to display your camera feed and your guest’s feed side by side, along with name tags and talking points. Meanwhile, if you’re live streaming sports, you will want layouts for OBS that allow you to keep track of the score and highlights. Gaming live streamers will want to be able to show their live reactions and their gameplay at the same time, while also leaving space for follower alerts and interactions.
Once you know your goals, you should have a rough idea of what you want your broadcast to look like and can start creating your first layouts for OBS.
OBS Studio always starts with a blank scene, where you can add the Sources you want to include in your live stream. A Source is any kind of image, text, video, or other element that will appear on your screen layout. In other words, they are the different pieces of audio, video, and graphics that come together to make your scene.
A scene is the layout of a screen that frames the content transmitted while you stream. For example, a countdown to the live stream might be the first scene you see as you tune into a gaming live stream.
We recommend you start by creating your live stream scene, because this is the screen your audience will see for most of your broadcast.
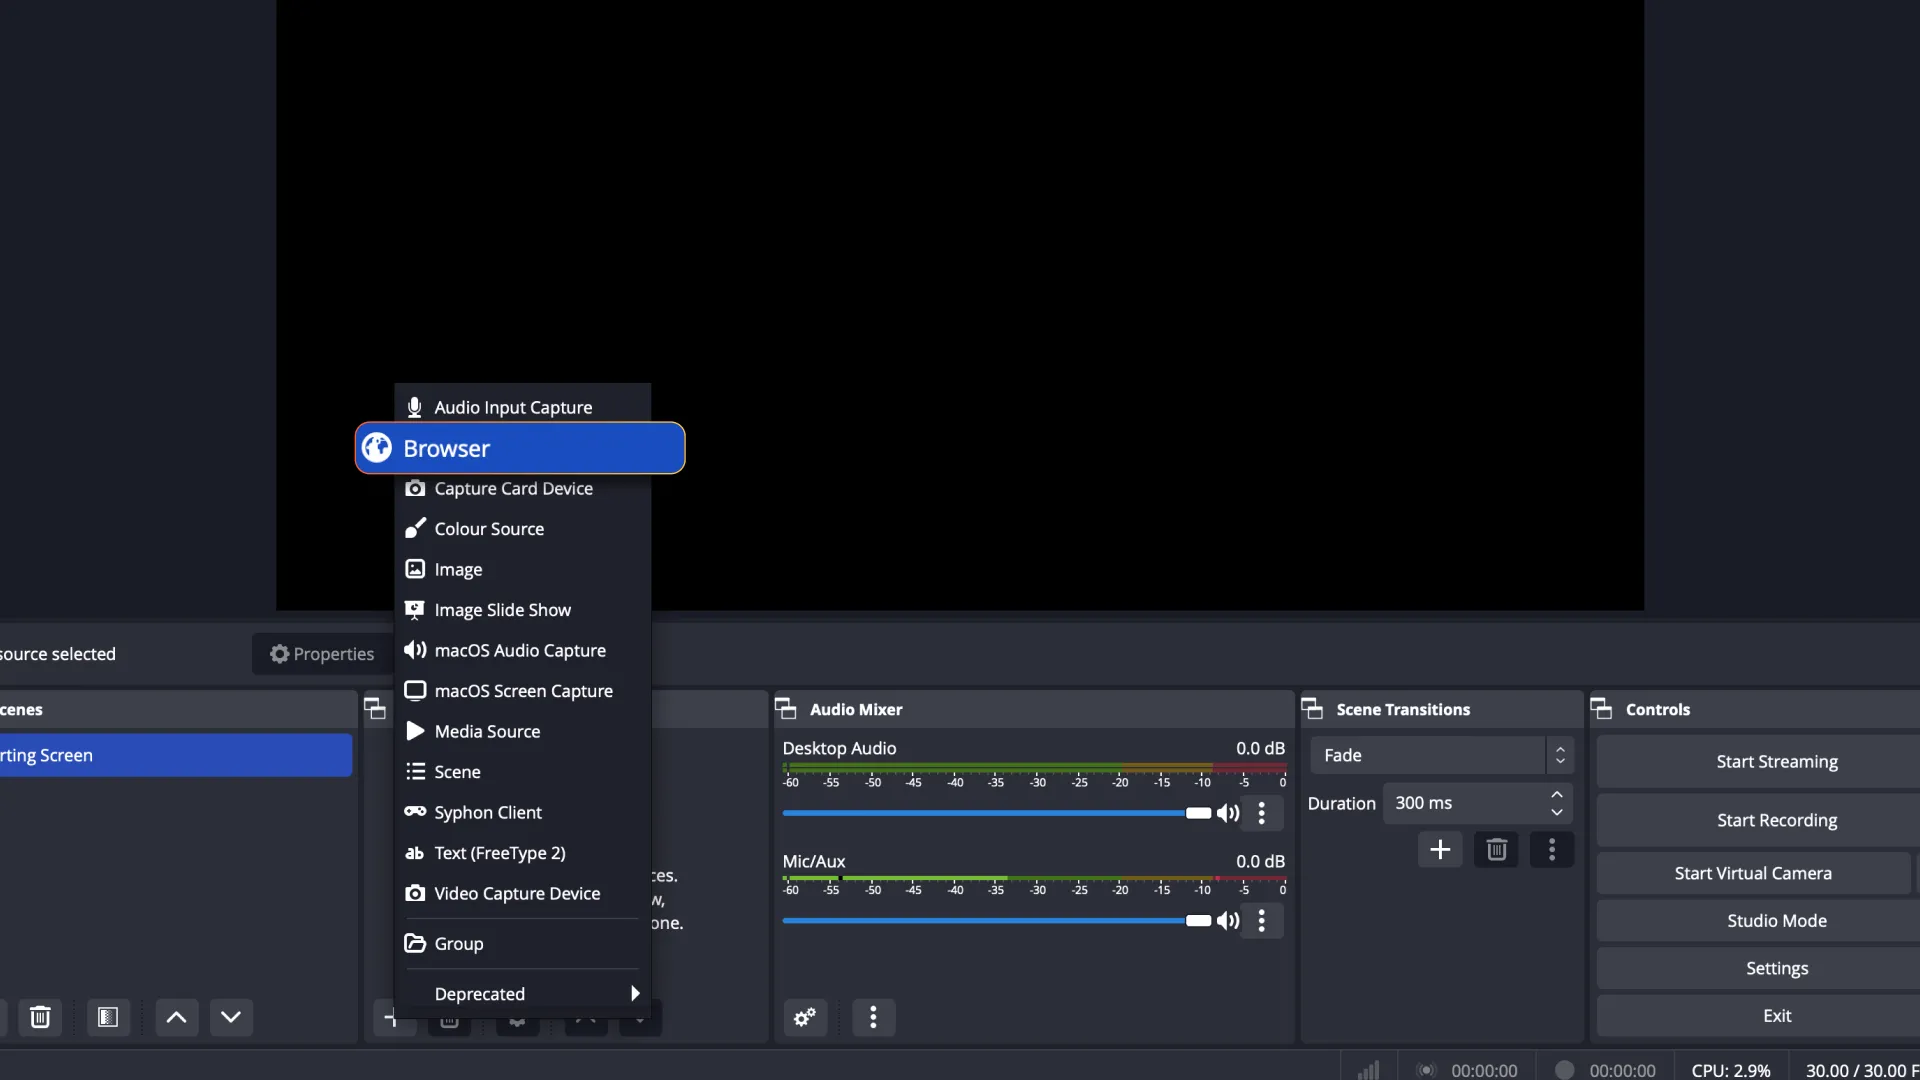
Click on the + symbol at the bottom of your Sources dock to add a Source.
You can add a video capture source to add your webcam feed, or capture cards, or game capture. You can also add a Display Capture Source, Window Capture Source, or macOS Screen Capture Source (depending on whether you’re using Windows, Linux or macOS) to capture your entire desktop screen or a single window.
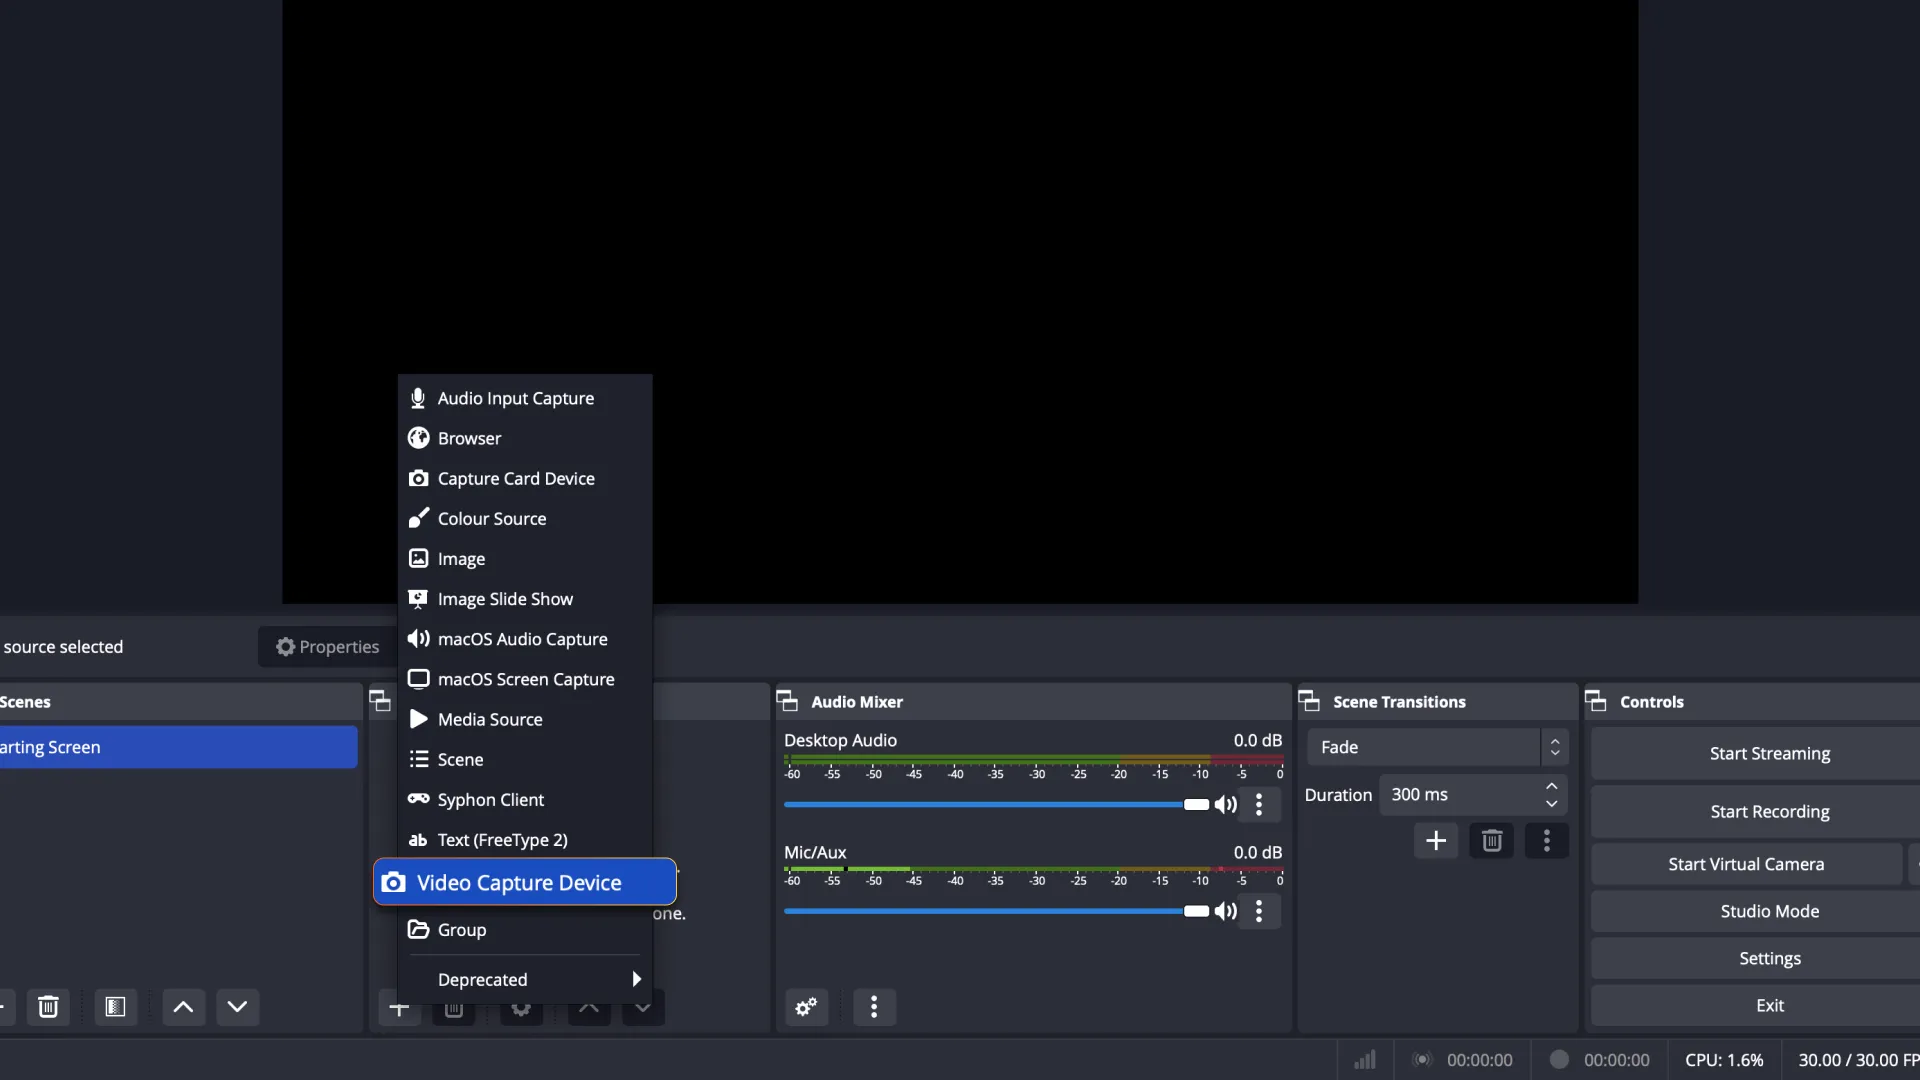
If you want to add another audio source that isn’t your desktop audio and microphone, you can add an Audio Input Capture. Remember to adjust your volume levels within the scene via the Audio Mixer.
When organizing your feed, think about what you want your audience to look at the most. This should take up most of the screen and be as central as possible. You can rearrange your sources easily on the OBS preview screen to make each source the dimensions you want.
If you’re looking for more inspiration, you can also find more stream layout OBS software tips on the official OBS knowledge base.
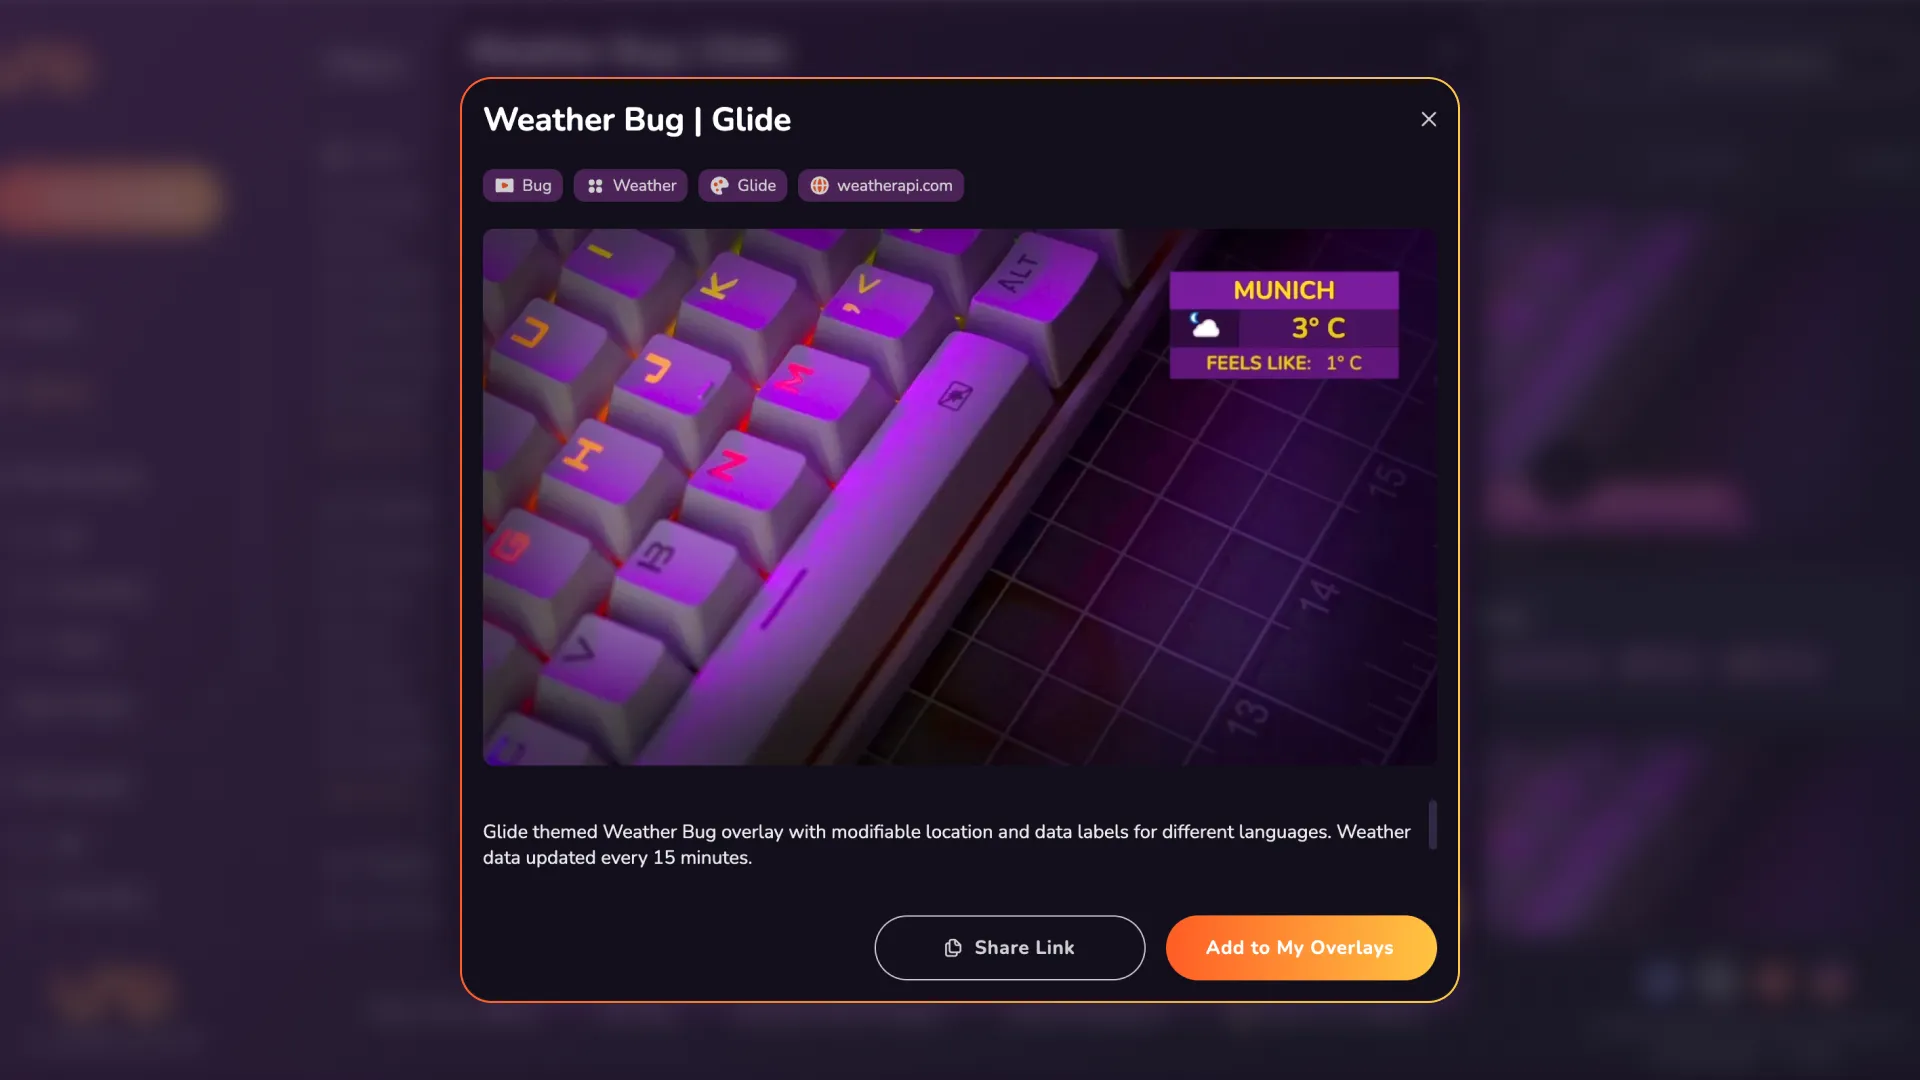
After you’ve added your video captures sources and audio sources, you can start adding our free overlays to your stream. Depending on your content, you may want to add social media widgets, a ticker or panel for talking points, alerts, or an events list.
OBS supports multiple browser sources and therefore multiple uno outputs. You can add as many individual elements from uno as you like, and customize them to match your branding and themes.
Select the overlay you want to place in your stream layout for OBS and press “Add to My Overlays”.
Go to “My Overlays” and double click on the overlay you want. This will take you directly to the controls, which allow you to edit and customize the overlay however you want.
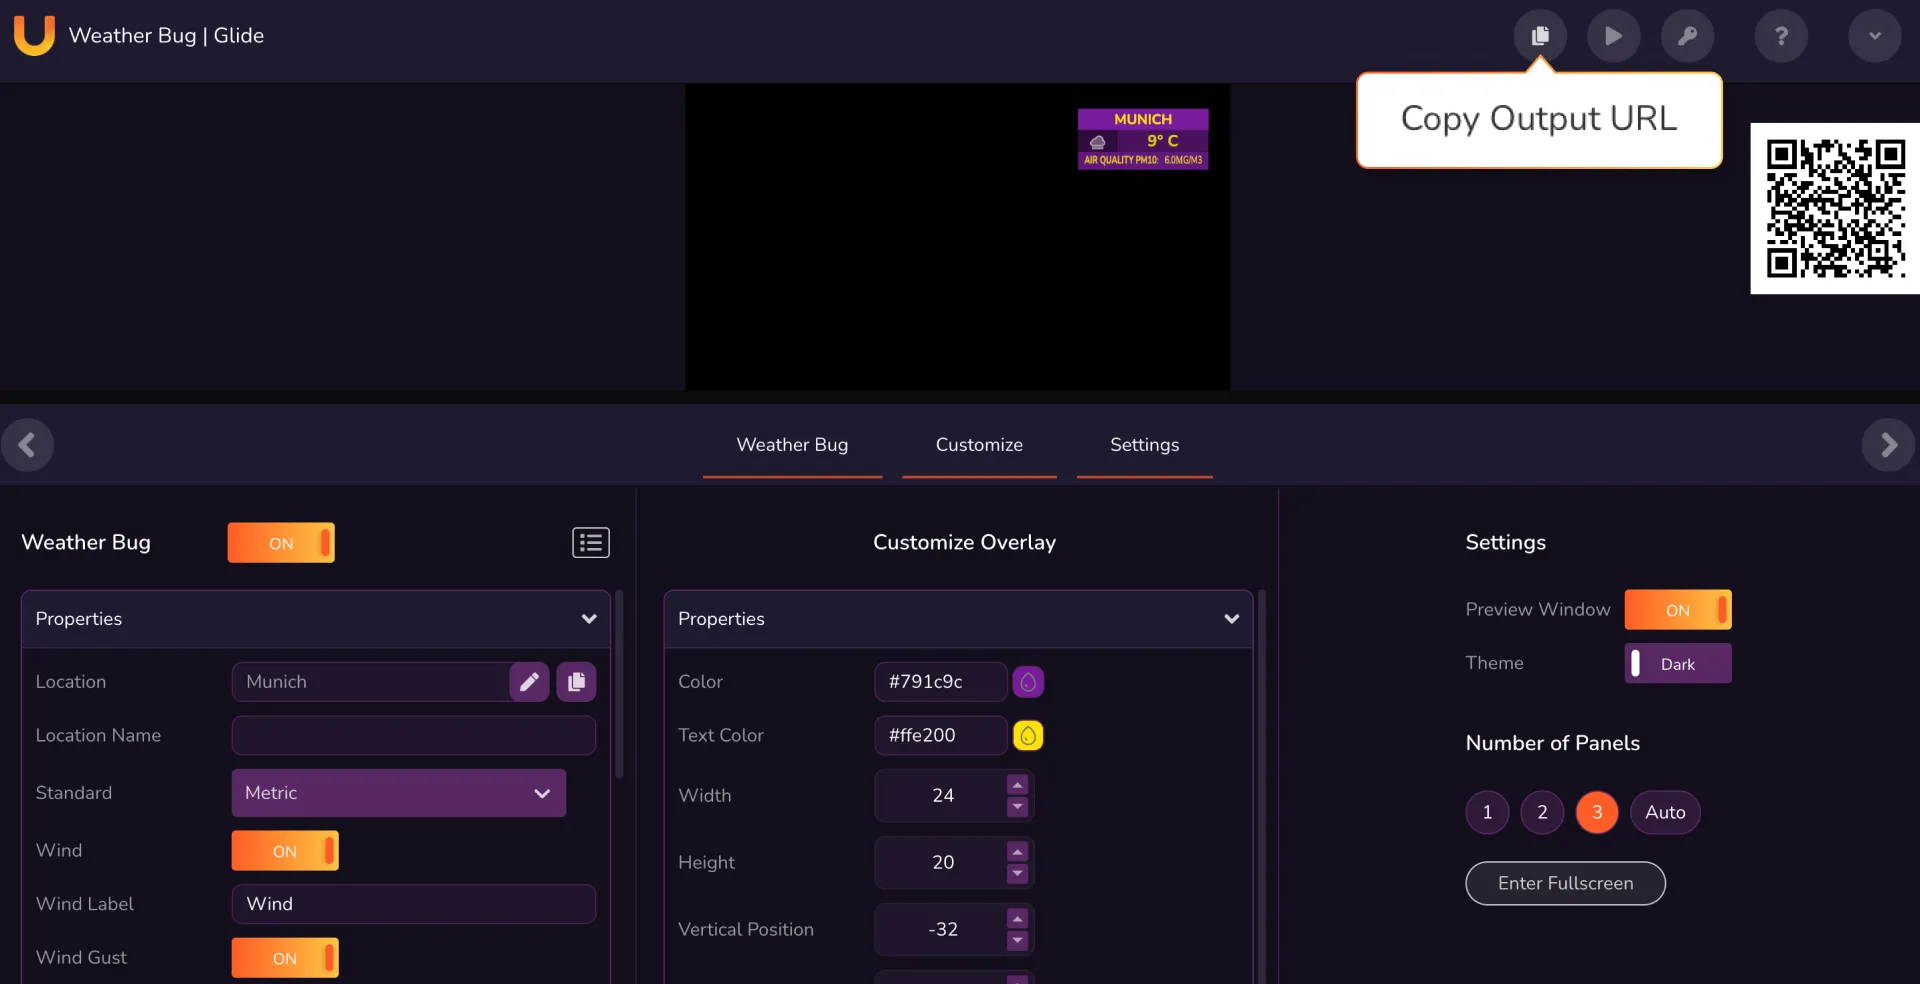
You can set up your overlays quickly by using our drag and drop feature. Click our output URL icon in any uno overlay and drag it directly into your OBS app. This automatically creates a browser source at the same resolution that is set in OBS.
Or, alternatively, copy the URL for the overlay element you want to add to your OBS studio layout. Go to the Sources dock in OBS, select + and choose Browser. Name your new Browser Source and paste in the overlay URL.
Keep an eye on your overlay dimensions. (Usually, overlays work best in 1920 x 1080.) You can move and resize your overlays in the overlay editor, or from the OBS preview window.
Remember, there’s no need overcrowd your screen. Stay simple and focus on the main content. It’s always better to frame your layout around your content, rather than vice versa. Once you get more comfortable with editing your stream layout for OBS, you can reorganize and play around with OBS studio layouts.
By using the uno interface, you can also turn different uno overlays off and on to clear space on your screen and redirect your viewer’s attention.
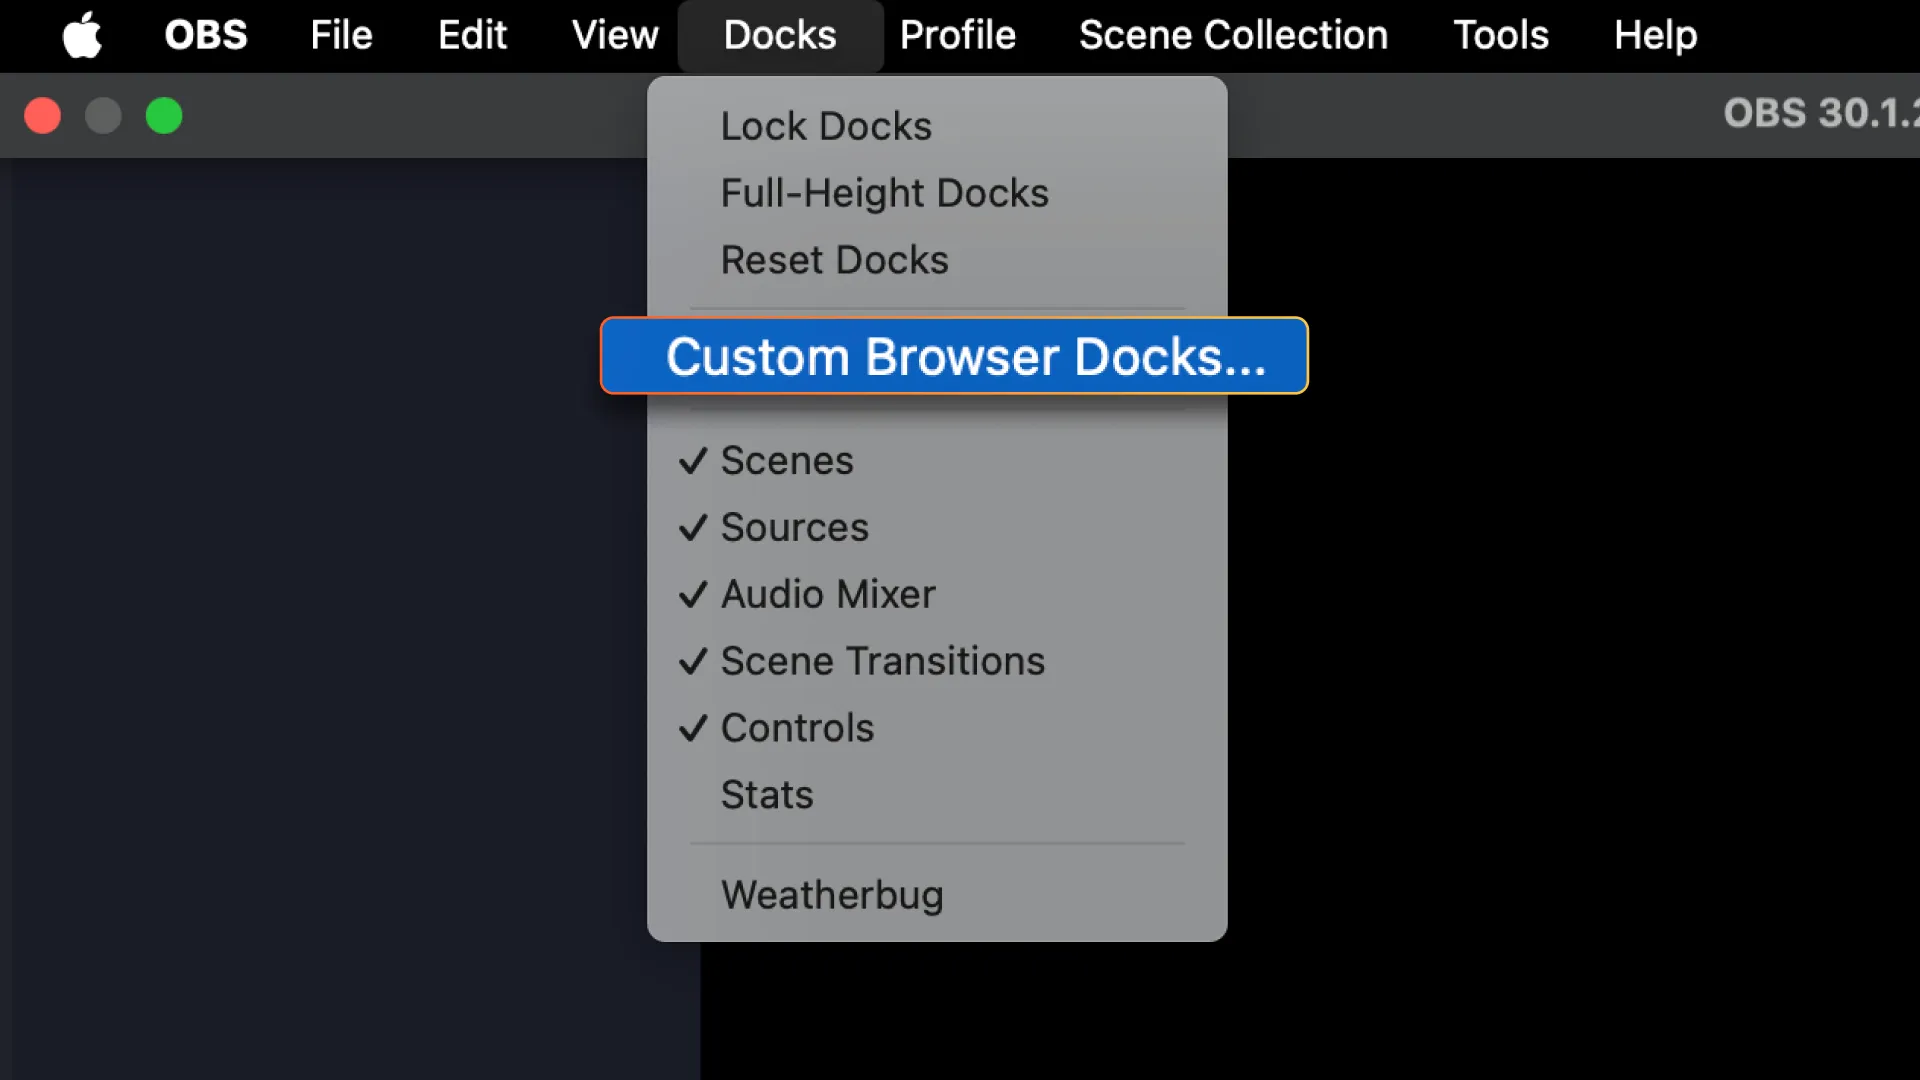
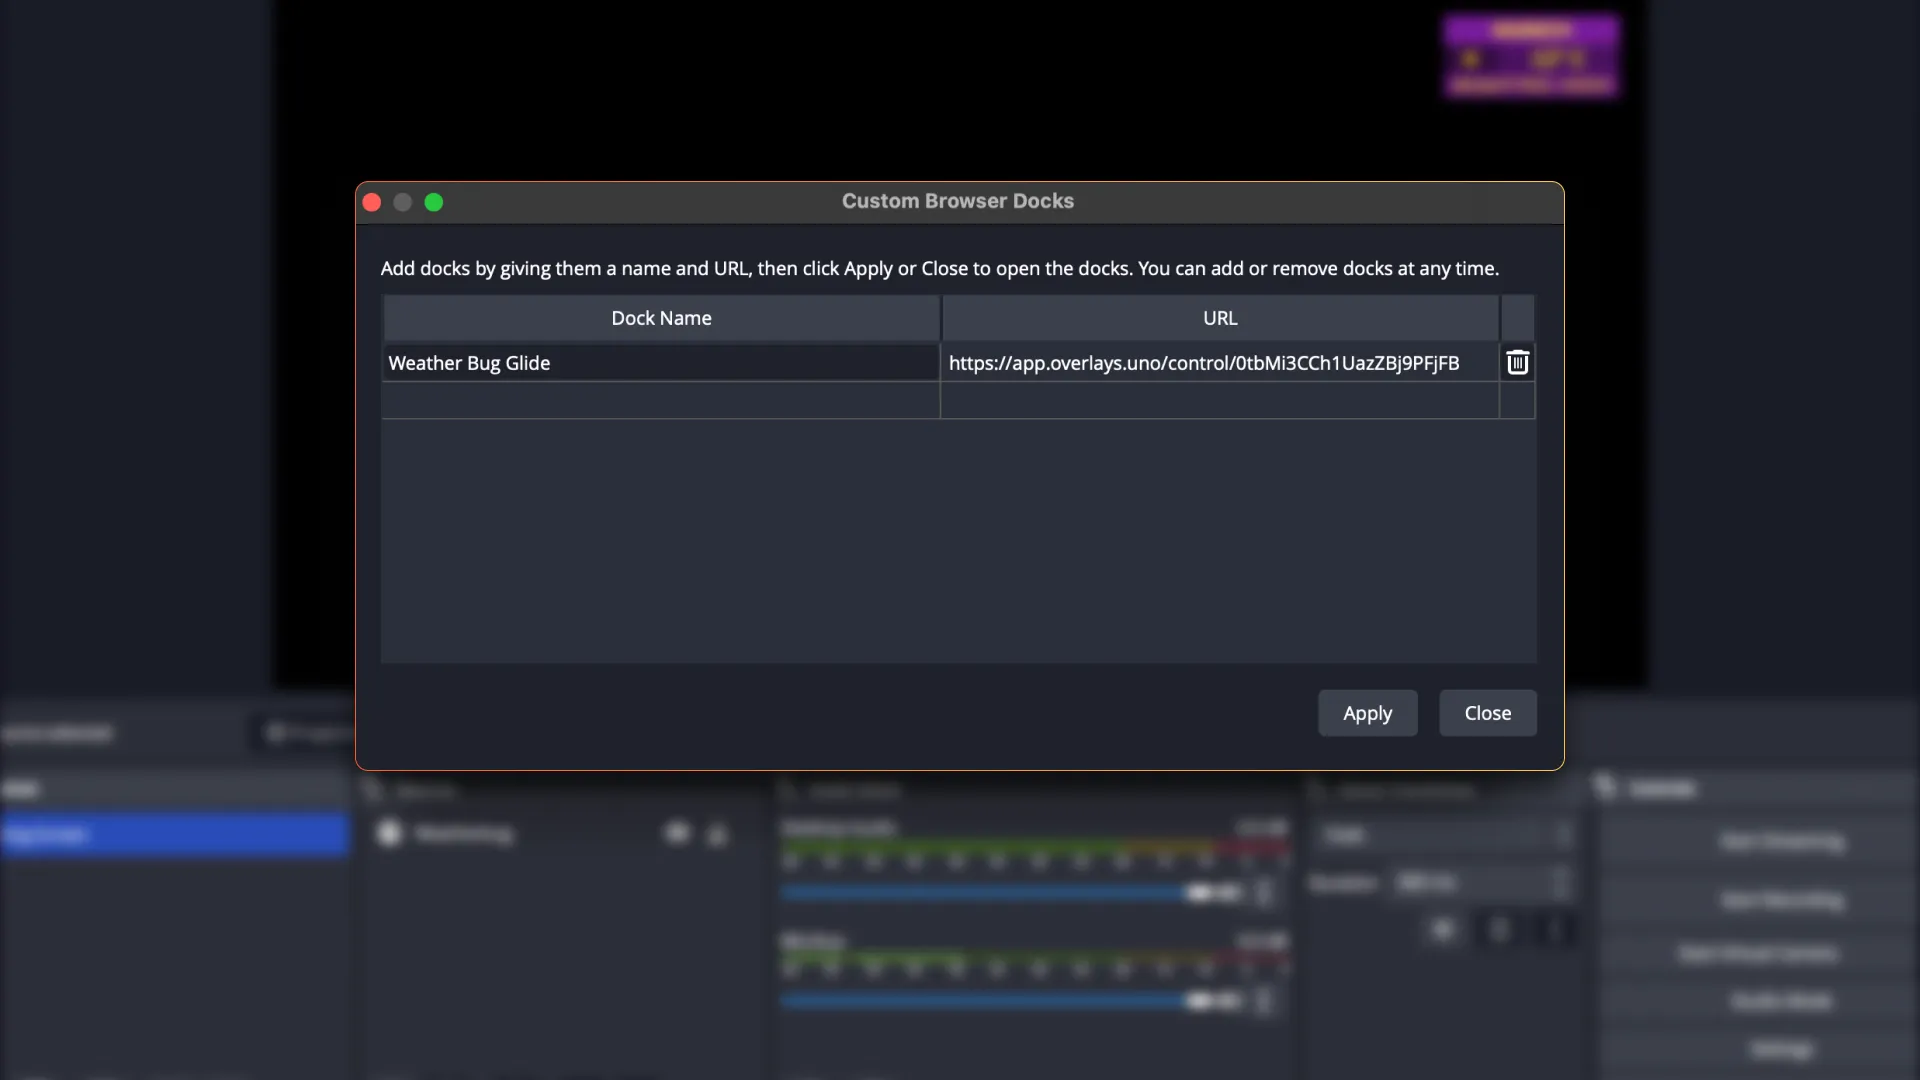
On the menu, go to Docks/Custom Browser Docks. Create a name under “Dock Name” and paste the URL for our control interface.
The uno interface will appear as a window in OBS, and you can drag and drop to different sides of your OBS app, so you can control all your overlays in one place.
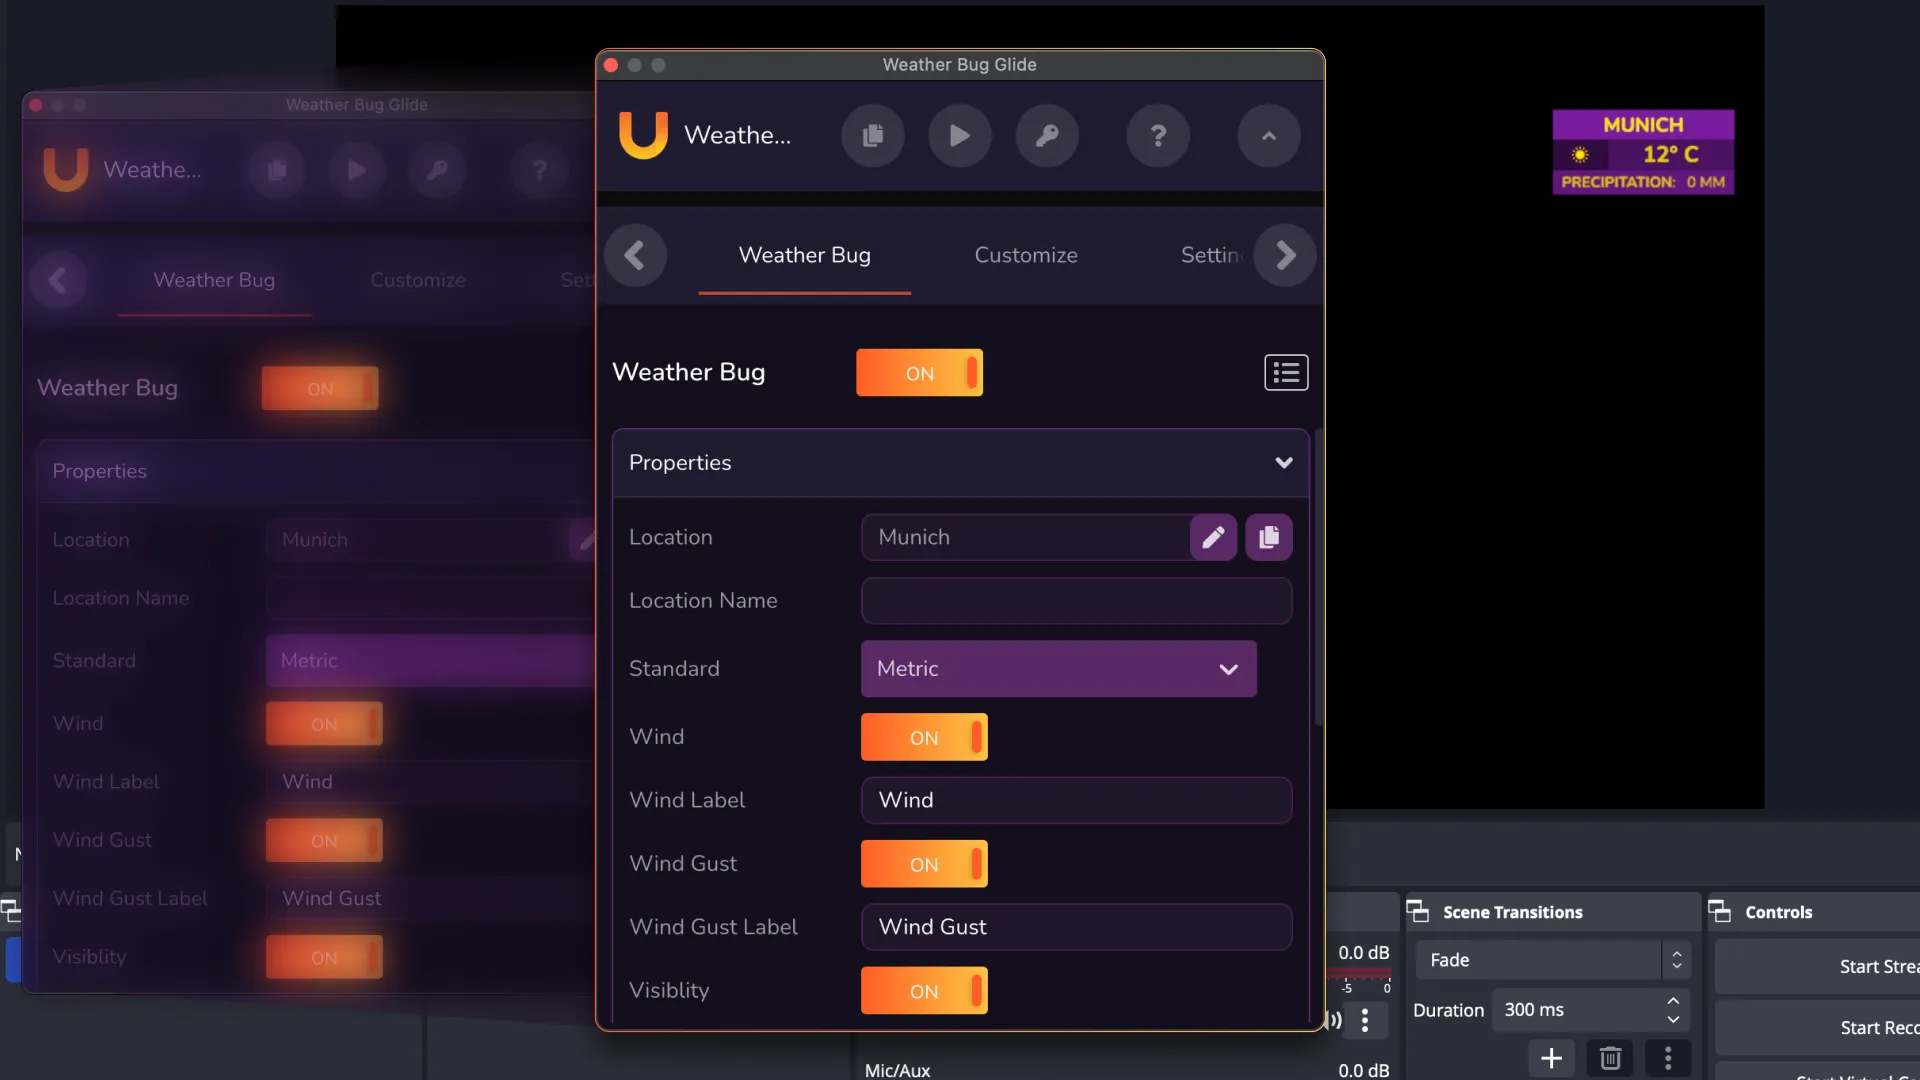
Depending on the size of your screen, and if you're using our free version (which comes with ads), you might have limited space in the uno Browser Dock. If you're finding it difficult to navigate, try right clicking on the Browser Dock and clicking Zoom Out. This helps make everything smaller, so you can find all the controls you need.
You can also drag the uno Browser Dock into separate window, and make it as large (or as small) as you need to suit your work setup.
Because OBS remembers all your settings, whatever settings you pick will stay the same the next time you launch the software, allowing you to get straight to the streaming.
You can learn more about our ads policy here, or upgrade to Uno Plus to get rid of all ads entirely and unlock fantastic new features!
Creating your first stream layout for OBS is relatively simple and beginner-friendly, and you can get more creative as you build up your streaming experience. However, if creating your own customized layout seems overwhelming, uno offers a number of ready-to-use layouts for OBS. Browse our Stream Packs and Packages for full OBS studio layouts with customizable pre-set stream elements from our overlay library and get started today.

