Resources
Viewers love faces, which is why a facecam can be the secret component to increasing audience engagement. Make your stream more exciting by sharing your live reactions, and add a professional polish with a webcam border. Here are our tips on setting up your webcam, and using OBS to add a facecam and webcam overlay.
There are few things you can set up easily and within your budget to make sure your raw video feed appears polished and professional – without wasting precious time on installs and RAM on filters.

Once you’ve added your screen capture or main camera source to OBS, here’s how to add your webcam feed:
1. Click the + symbol in your Sources dock.
2. Click “Video Capture Device”.
3. Name your webcam.
4. Select your device name from the Device dropdown list.
It might go without saying, but when adding a facecam to your streaming layout, don’t block anything important. If you’re live streaming arts and crafts or other hobbies, some overlap between your facecam and the main camera should be fine so long as you aren’t covering up any important things. If you’re live streaming gaming, viewers tend to want to see as much of your screen as possible to catch all of the action.
The lower third section of your screen is considered to be the area least likely to distract viewers from on-screen action. You can use this theory to add your facecam to the bottom left corner of your streaming screen. However, some streamers choose to add their facecam in the top right of the screen, and filling the rest of the empty space with widgets, notifications, or custom backgrounds.
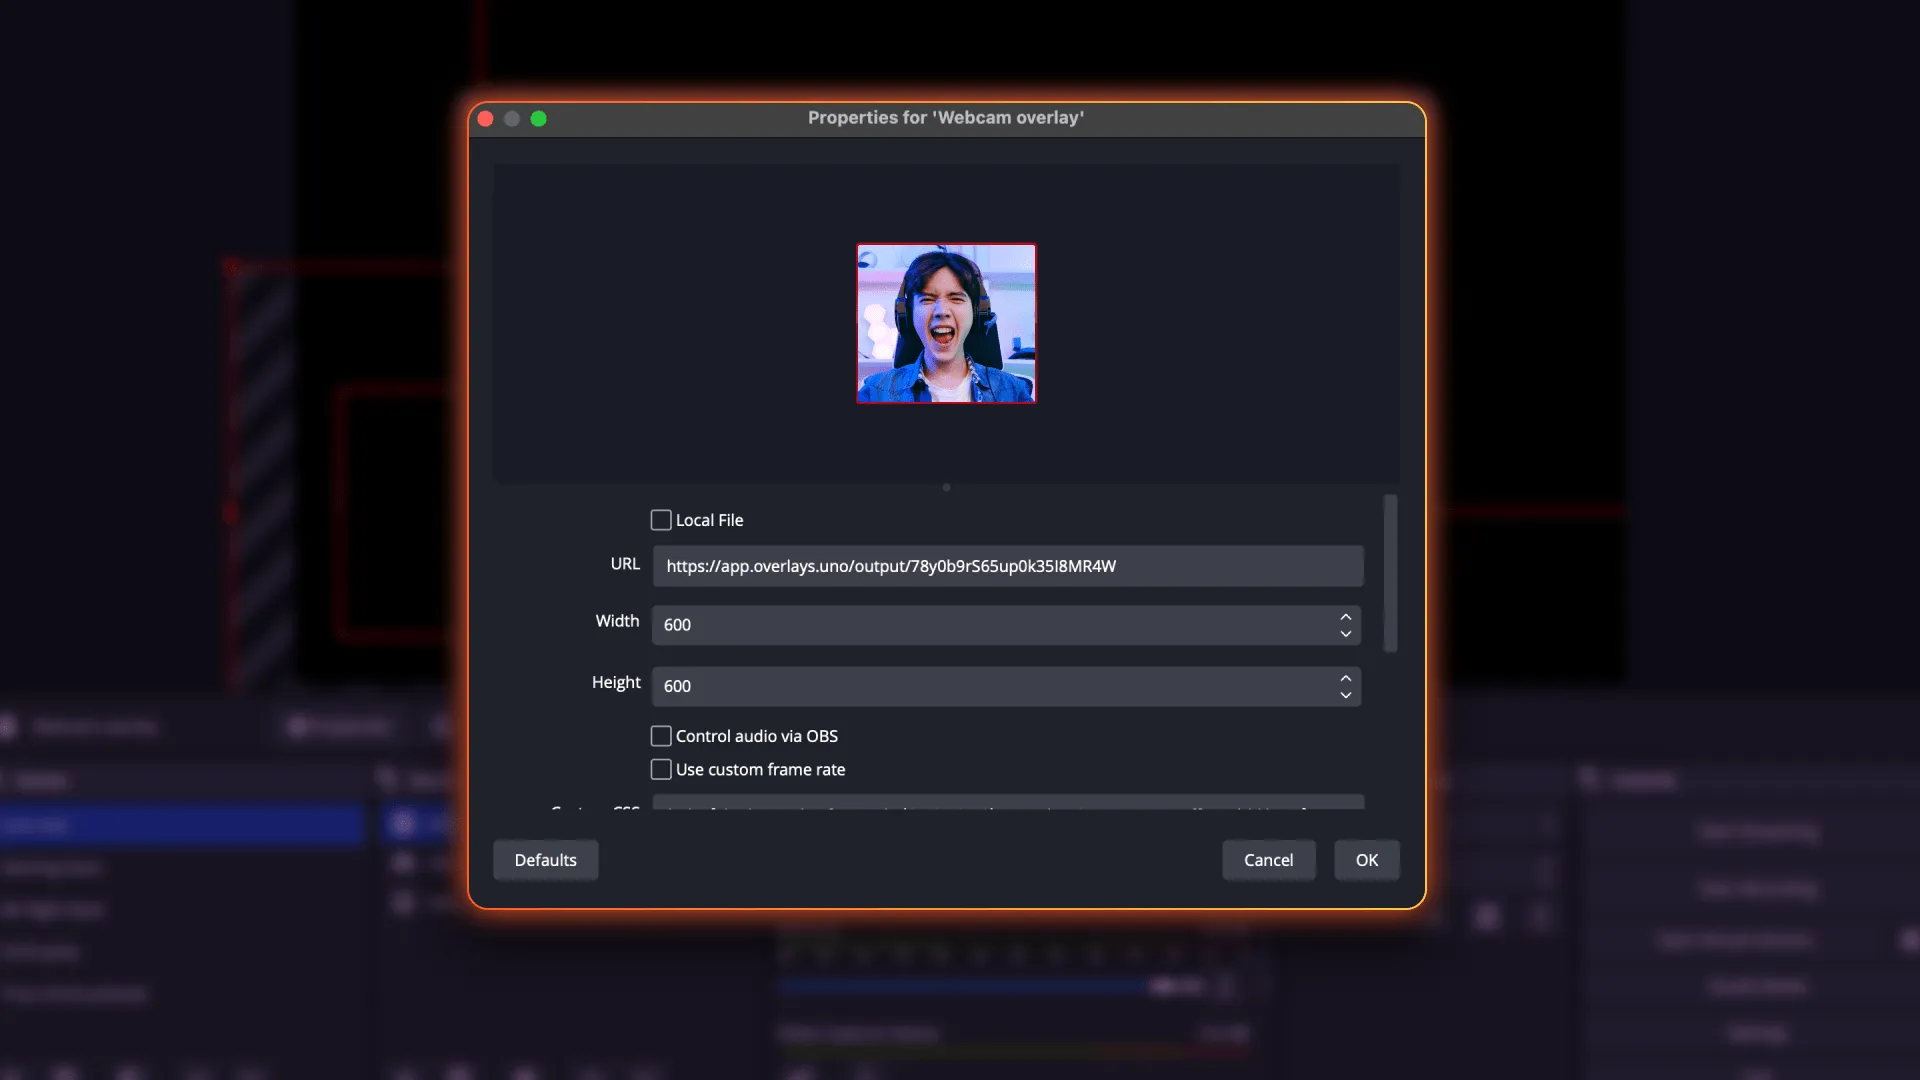
Reposition and resize your facecam by dragging the borders around your screen in OBS. You can also manually adjust the width and height of your video capture. Right click on your webcam in the Sources dock and click on “Properties” to adjust your facecam properties.
A webcam overlay decorates and frames your webcam, separating it from the main action and attracting the viewer’s eye. Here are some options for decorating your facecam:
As with most stream overlays, you can make your own webcam overlay using tools like Photoshop, Illustrator, After Effects, and Blender. You can also commission a freelancer to create a super-personalized, fully-branded webcam overlay – but this might stretch your budget a bit.
You can also use our new fully customizable webcam border, inspired by @EagleGarrett. This transparent overlay is fully customizable to your branding and free to use. Plus, because all our overlays are controlled through our online interface, you don’t have to download any overlays and you can edit them in real-time, from any of your devices.
Here’s how to place our webcam border over your facecam in OBS Studio:
1. On overlays.uno, add the Nitrogen-themed Web Cam Border overlay to My Library.
2. Edit the overlay in the online interface. Customize colors, edit or delete the text, and modify the line’s thickness and style to match your branding.

3. Click the Copy Output URL symbol to copy the overlay browser link.
4. Go to OBS Studio. Click the + symbol in the Sources dock.
5. Click on “Browser”.
6. Paste the uno overlay browser link into the URL tab.
7. Adjust the overlay’s size and position by dragging the corners of the bounding box.
You can alter the dimensions of your webcam overlay using either or both of these tools:
In OBS Studio, right click the webcam overlay in your Sources dock, and select “Properties”. You can manually enter the width and height you want.
Integrating a facecam with a polished webcam overlay can transform the production quality of your live stream. With this quick guide, you should be able to set up your facecam on OBS Studio with minimum fuss and within budget – especially when your webcam border can be edited again and again online, for free! If you’re still not sure how to begin, find support on our Discord community.

