Resources
There are many different ways you can use uno overlays to create great stream layouts in OBS Studio. However, if building a scene with several overlays in OBS sounds overwhelming, our stream packs have ready-to-use layouts that come with multiple functions. This can be super useful if you’re launching a live stream podcast or Just Chatting stream. Here’s a quick guide on how to add video source to OBS and align them with one of our stream packs.
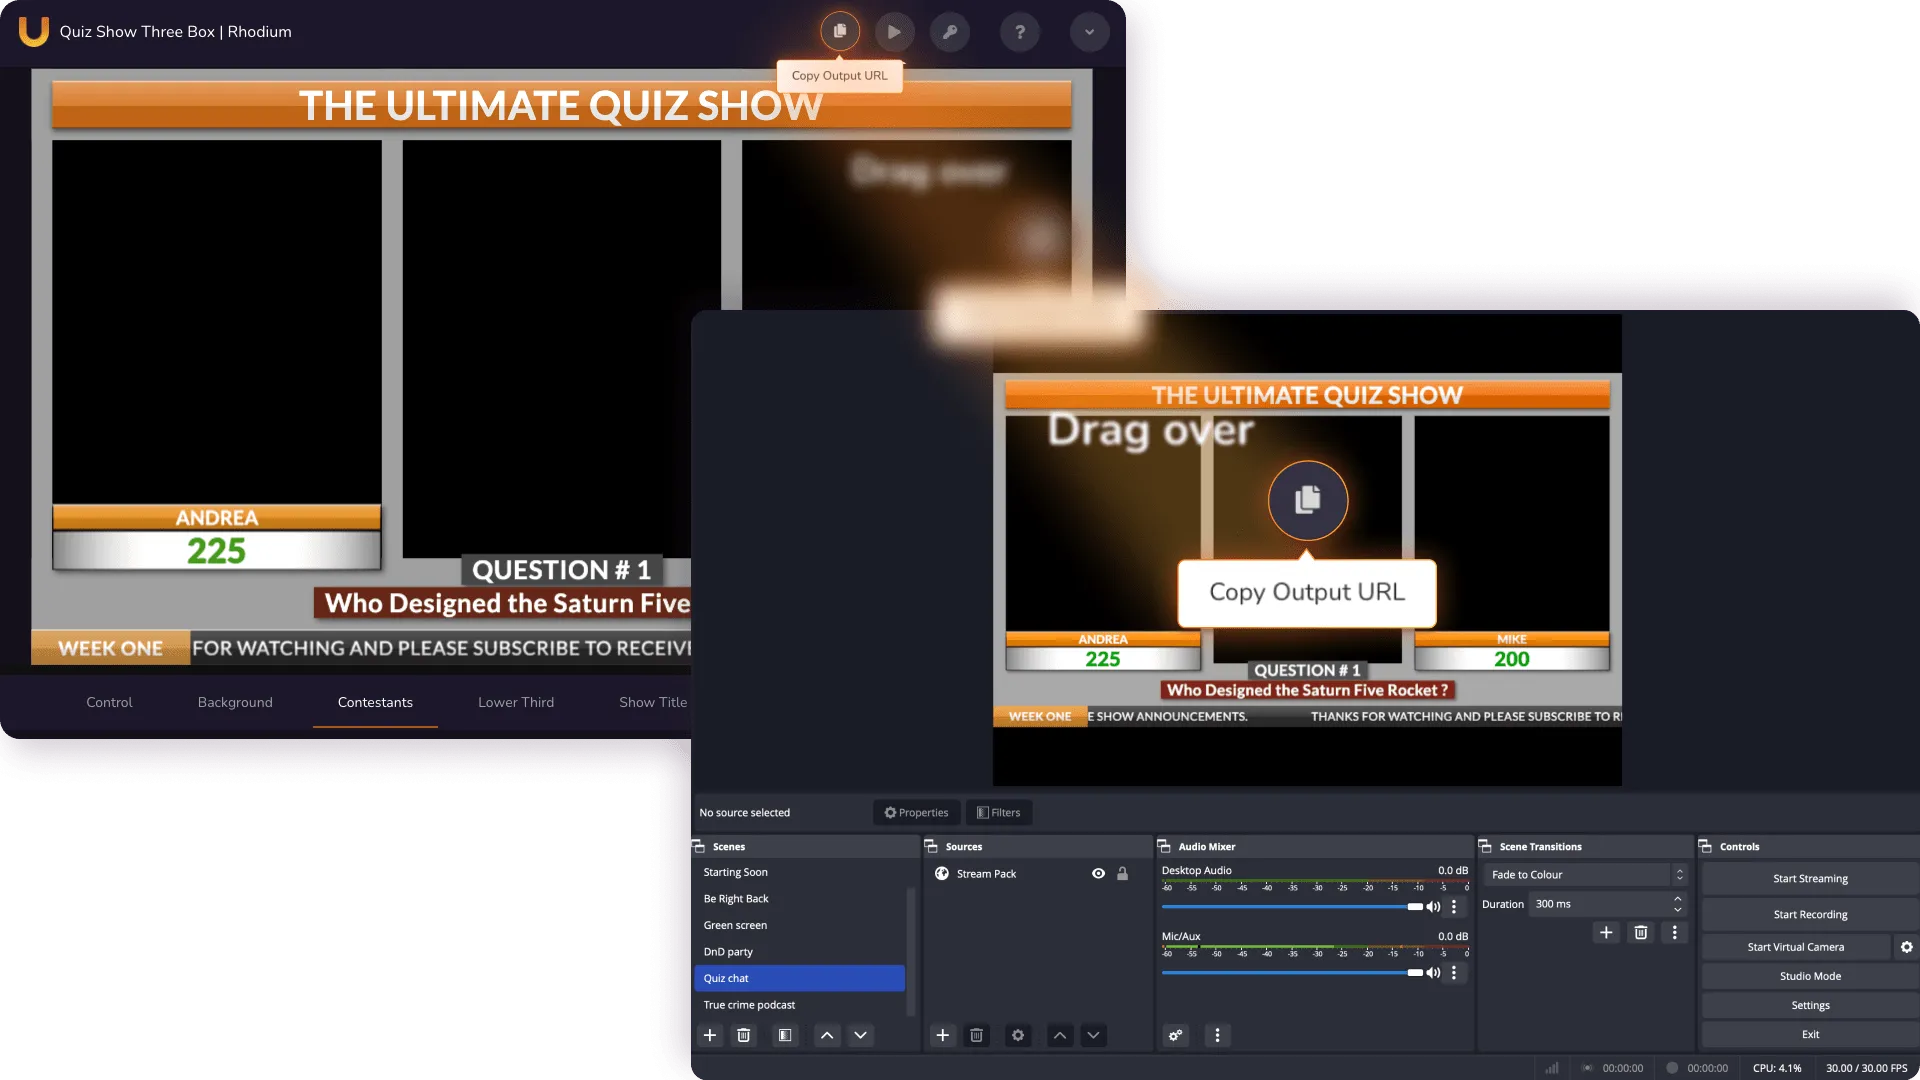
You can set up one of our stream packs in OBS Studio by using our drag and drop feature. Simply click the Copy Output URL icon from the overlay controls, and drag it directly into your OBS app. This automatically creates a browser source at the same resolution that is set in OBS.
Move and resize your overlays by using the overlay editor, or from the OBS preview window. We recommend you use our overlays in 1920 x 1080.
Tip: Control your Stream Pack without having to navigate away from OBS with the uno interface. On the menu, go to Docks/Custom Browser Docks. Create a name under “Dock Name” and paste the URL for our control interface. This creates an uno interface window in OBS that you can drag and drop to different sides of your OBS app to easily control your OBS layout.
Whether you’re using your device’s built-in camera, or a fancy DSLR setup, you can add your video source to OBS and edit in OBS to fit the overlay. Here’s how to add video to OBS for editing:

1. Click the + symbol in your Sources panel.
2. Click “Video Capture Device”. Name your camera source (for example, “Webcam” or “Cam 3”).
3. Select your device name from the Device dropdown list.
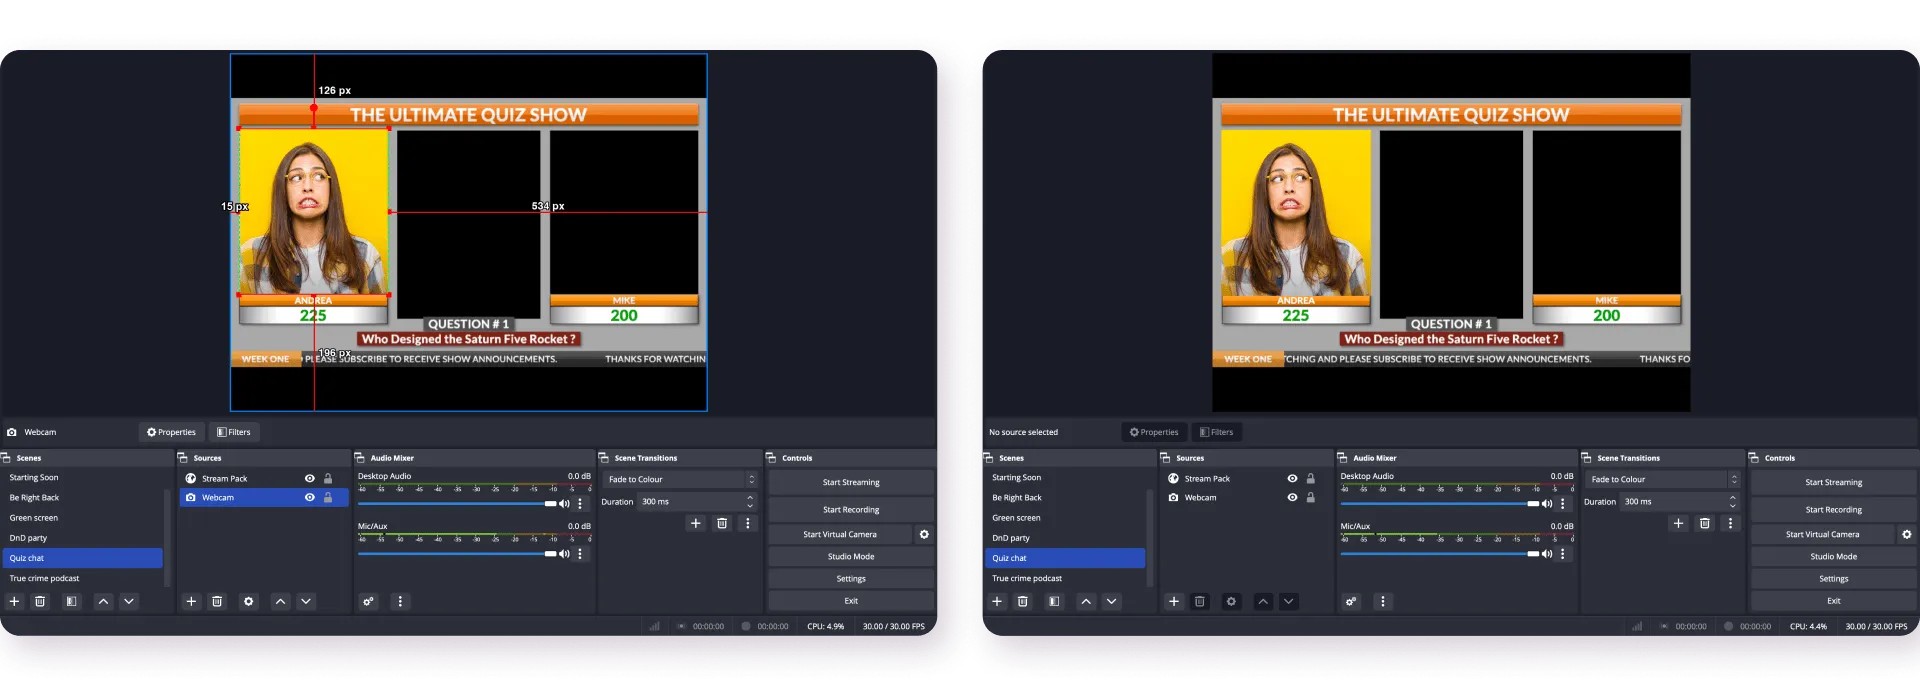
4. Now you can use the red borders to crop and resize the video feed to fit the stream pack’s borders.

You don’t always have to fit the overlay borders perfectly. By reordering the source layers, you can fit things exactly how you want them, with the video either behind or on top of the overlay borders to suit your preferences.
Select the stream pack from the Sources panel, then clicking the ⌃ arrow to bring the overlay to the front. You can also drag the sources to reorder them in the Sources panel.
To crop to fit the overlay borders, hold the Alt/Option key and drag the bounding box’s drag handles (or the small red circles on the red border). The border will turn green to show that you’re cropping.
You can also manually adjust your camera source. Right click the video source in the Sources Panel, then click on “Properties” to open up the Properties window. You can change the width, height and cropping.
For more advanced sizing, use the Edit Transform window. Click on your camera source, click the Edit menu, then select “Transform”. Click on “Edit Transform” from the popup menu. This allows you to set several details such as position, rotation, size, positional alignment, and more.
You might also want to add video from someone who’s joining your live stream remotely – like on Zoom or Google Meet. You can add remote sources to OBS just as easily as adding video capture from your webcam.
Note: Browser Source links to video call platforms like Zoom, Teams and Google Meet require usernames and passwords, which can cause an app or meeting login screen to show up in OBS Studio instead of the video call’s footage.
That’s why using Screen Capture or Window Capture is usually a better option for remote video sources. You can then crop and center your screen or window feed to fit the person calling in.
Here’s how to add any remote caller to our podcast overlays with OBS:
1. Click the + symbol in your Sources panel.
2. Click on Window Capture from the dropdown menu. Window Capture can be one of the easier ways to capture the video call only, instead of accidentally broadcasting everything you’re doing on your screen.

If you’re using macOS, click MacOS Screen Capture, then select “Window Capture” from the Method dropdown menu.
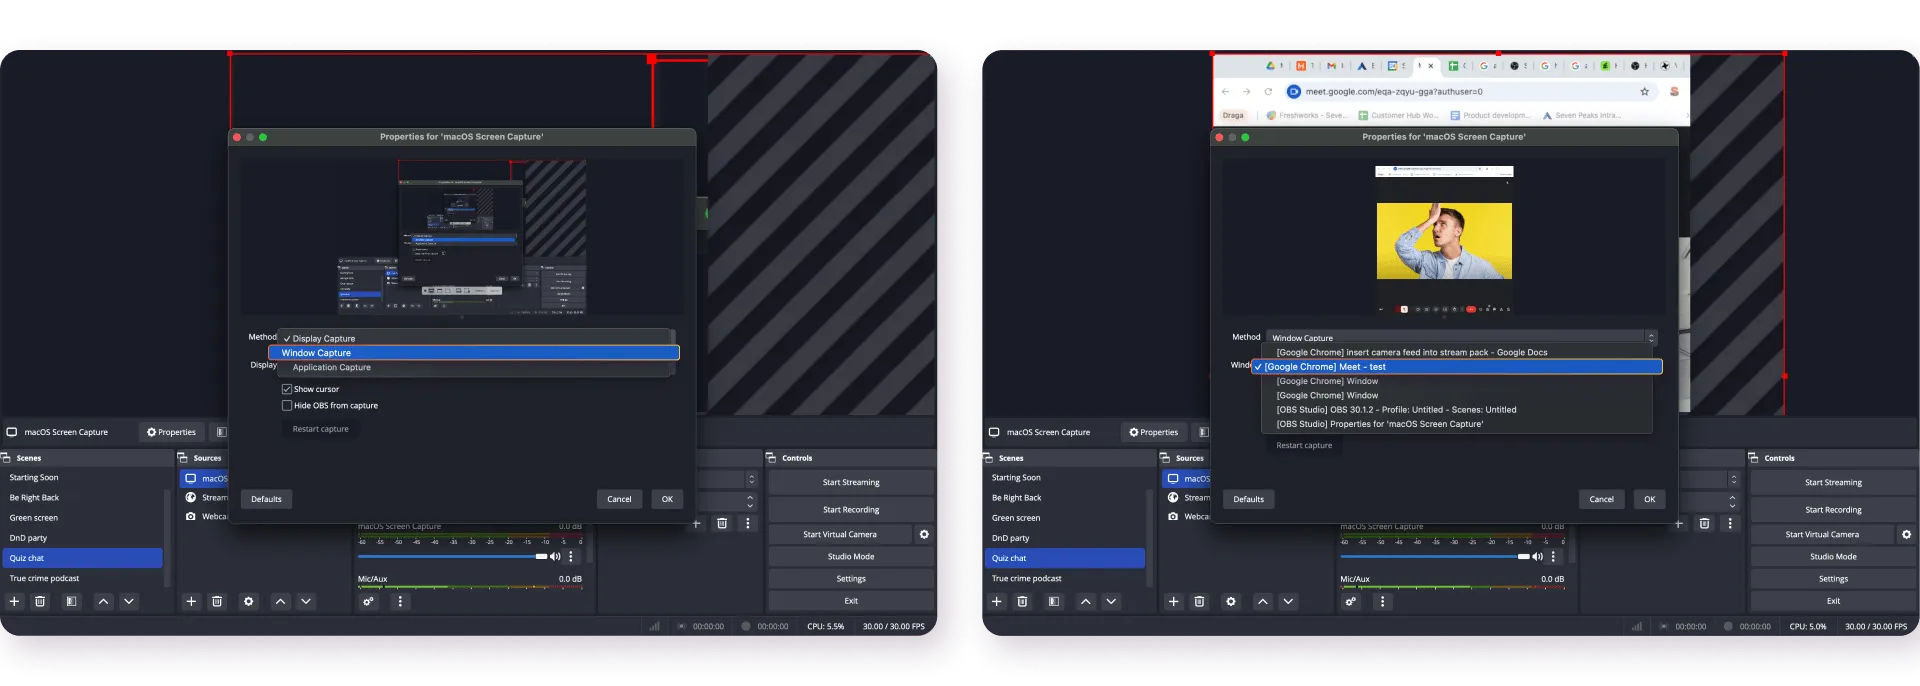
4. In the Window dropdown menu, select the video call window on your device. Remember to deselect the box next to “Show cursor”, so that your cursor doesn’t pop up in front of someone’s face while you’re live streaming and distract viewers.
5. You can now resize the picture by dragging the red borders. Adjust and crop the image to fit a person’s face by holding down the Alt/Option key and dragging the borders, similar to how you would readjust your own camera feed.
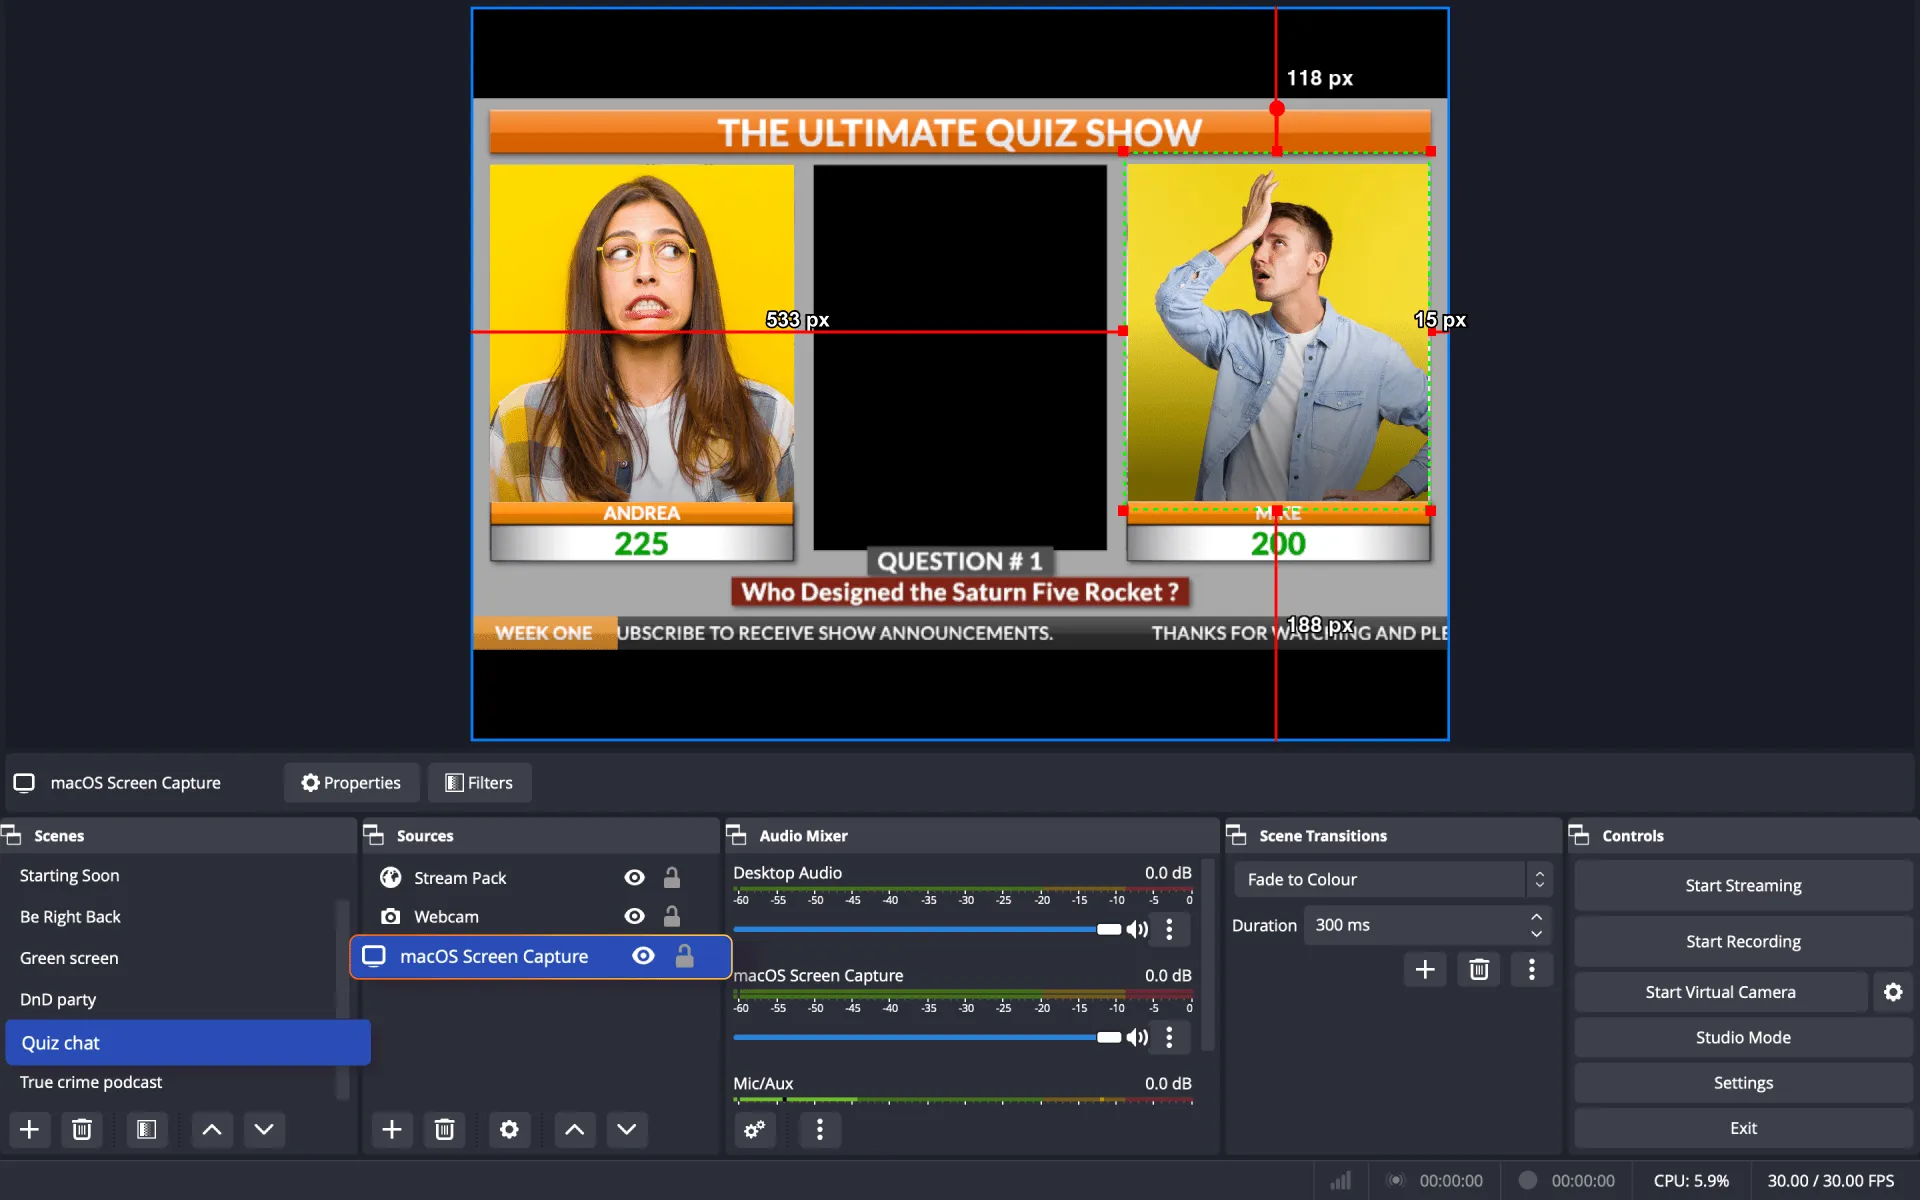
6. Send this Source to the back of the layout by selecting it in the Sources panel, and clicking the ⌄ symbol. You can also drag and drop the Source to reorder it in the Sources list.
And voila! You’ve now successfully added video sources to OBS with a stream pack, and are ready to go.
Tip: If you’re concerned about interruptions to your online guest’s camera feed, consider setting up multiple scenes in OBS with just one camera. That way, if your guest experiences issues with their connection, you can quickly swap to another layout without them and continue without too many disruptions.
You can add any variety of sources to OBS, and crop, resize, and adjust them to our stream packs, including media capture and your gaming device. It’s also good to check that you’ve added your audio sources to OBS before you start live streaming – or it’s going to be a very quiet podcast!

Any of our overlays are compatible with OBS Studio, and completely free to use. You don’t have to rely on ZIP files and downloads. Edit any overlay or stream pack online, and from any of your devices.
Multistreaming with OBS can take a toll on your CPU. We recommend closing the uno overlay interface window once you’ve set up your stream layout, and using the overlay controls on your mobile phone or iPad to spare CPU.
If you want more advice on how to add video source to OBS screens to match your favorite uno overlays, come chat to our community in the official uno Discord channel. We’re always trading tips and custom OBS layouts for streamers in every industry, and are happy to help get you started!

