Sign up for uno
Language
With uno overlays, you don’t have to rely on heavy ZIP files. However, if you want to edit a video and add graphics later, you can convert any uno overlay into a .MOV file. We’ve already created a guide for Windows, so here’s the free NDI Tools Mac devices need to convert overlays for post-production video editing.
You can record your uno overlay output with an alpha channel and import the recording directly into Adobe editing software to use in non-live content.
Alpha channels are layers of transparency on an image or video that represent the degree of transparency of a color (the red, green and blue channels). In alpha channels, white areas represent 100% opacity of the graphics, black means 0% opacity, and different shades of gray represent different levels of transparency.
By recording an uno overlay with an alpha channel, you can layer it over any other video or image while editing. Alpha channel is compatible with HEVC, WebM, animated PNG, OpenEXR, and many more formats.
OBS Studio is a free and open source software for video recording and live streaming. OBS works with several different video sources in capturing, compositing, encoding, recording and streaming video content.
Download the latest macOS version of OBS Studio.
DistroAV is a plugin that adds simple audio/video input and output over IP using NDI technology. (This plugin was previously branded as OBS-NDI. If you already have this plugin installed, remember to uninstall OBS-NDI before installing this version to update major and large code changes.)
Download the DistroAV plugin for free.
1. Click the “Go to download” button.

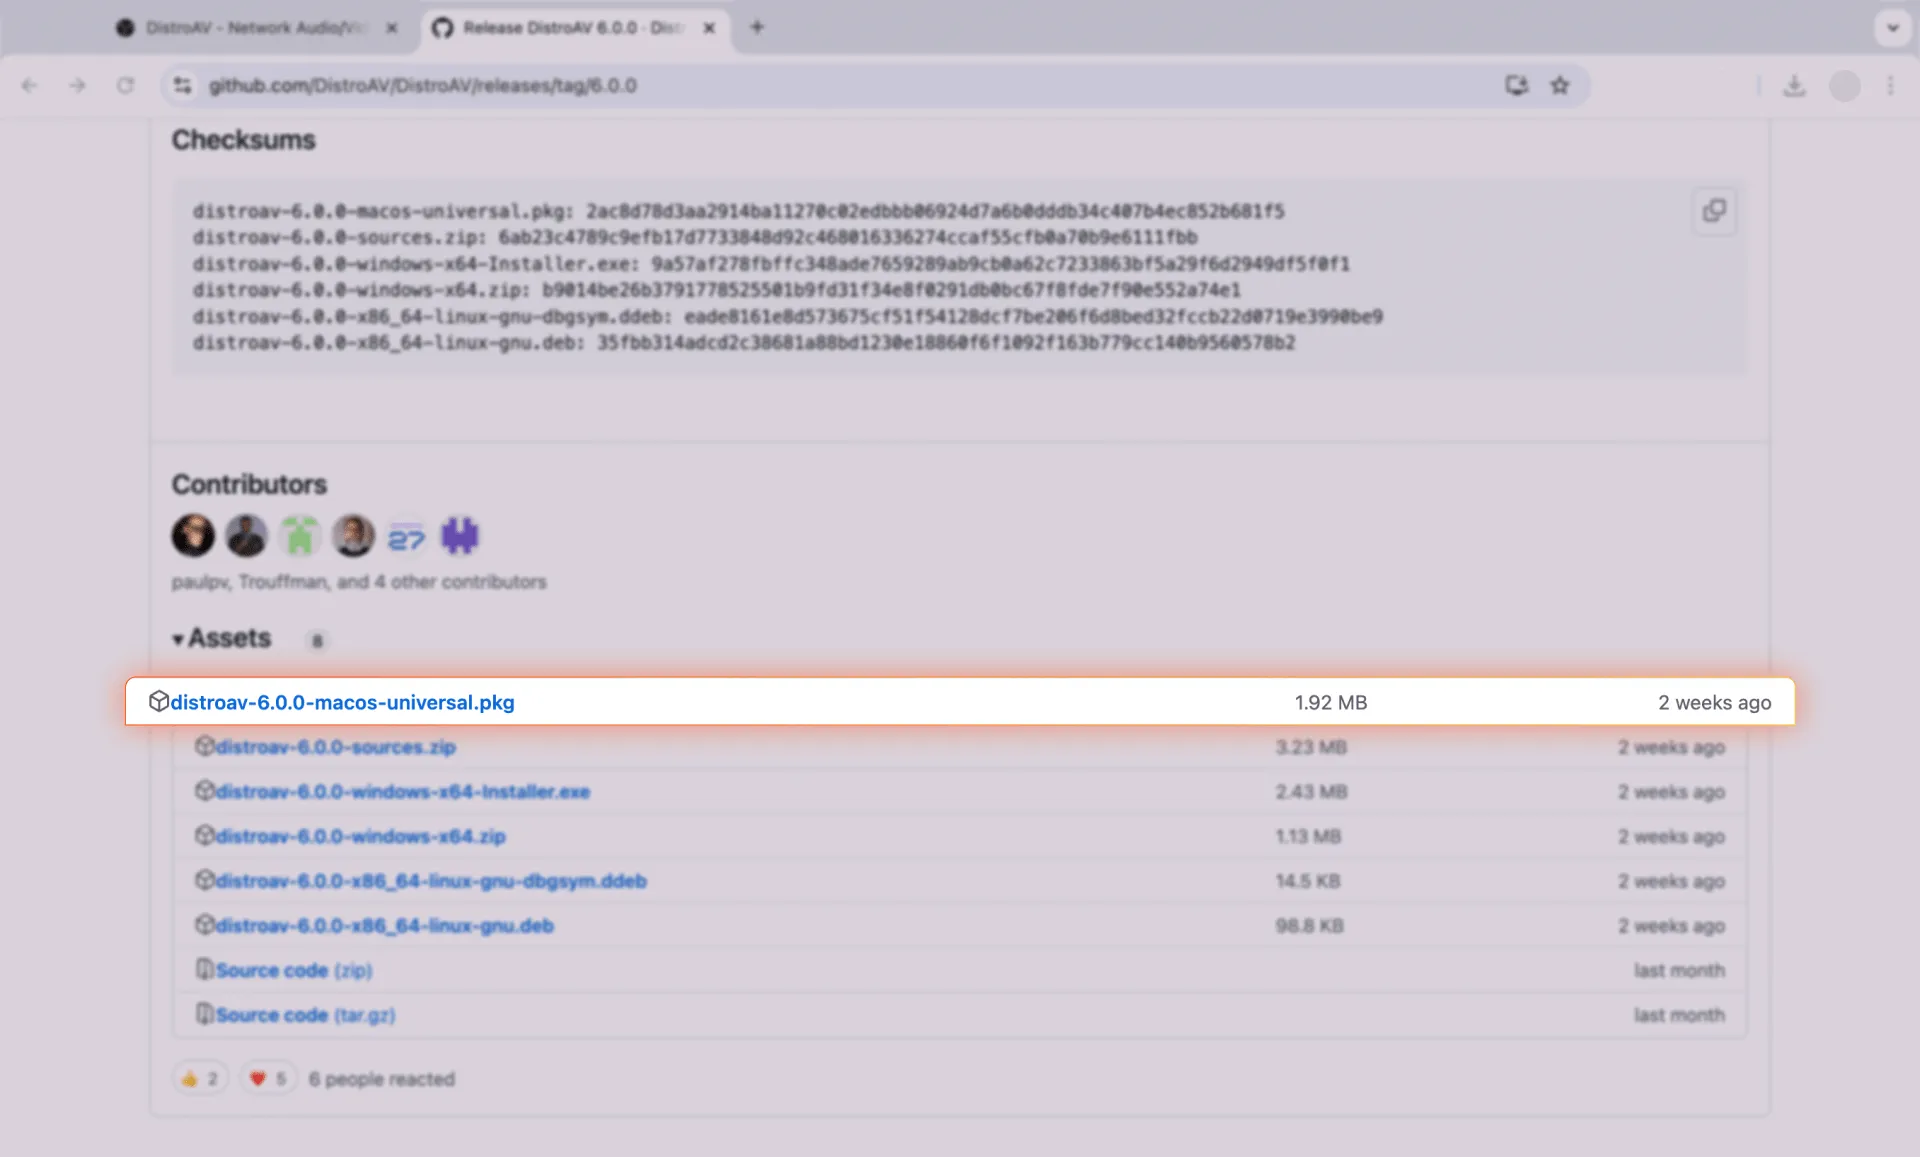
2. Scroll down to Assets and click on the installation package for Mac.

You should then follow the instructions that appear in the installation popup that appears on your screen.
The NDI feed generated by OBS will be picked up and recorded with transparency seamlessly by NDI Video Monitor. For macOS users, NDI Video Monitor allows you to view or display any number of NDI video sources across your network in real time, and you can record NDI files directly from multiple instances.
Note: After downloading, you will need to restart your device.
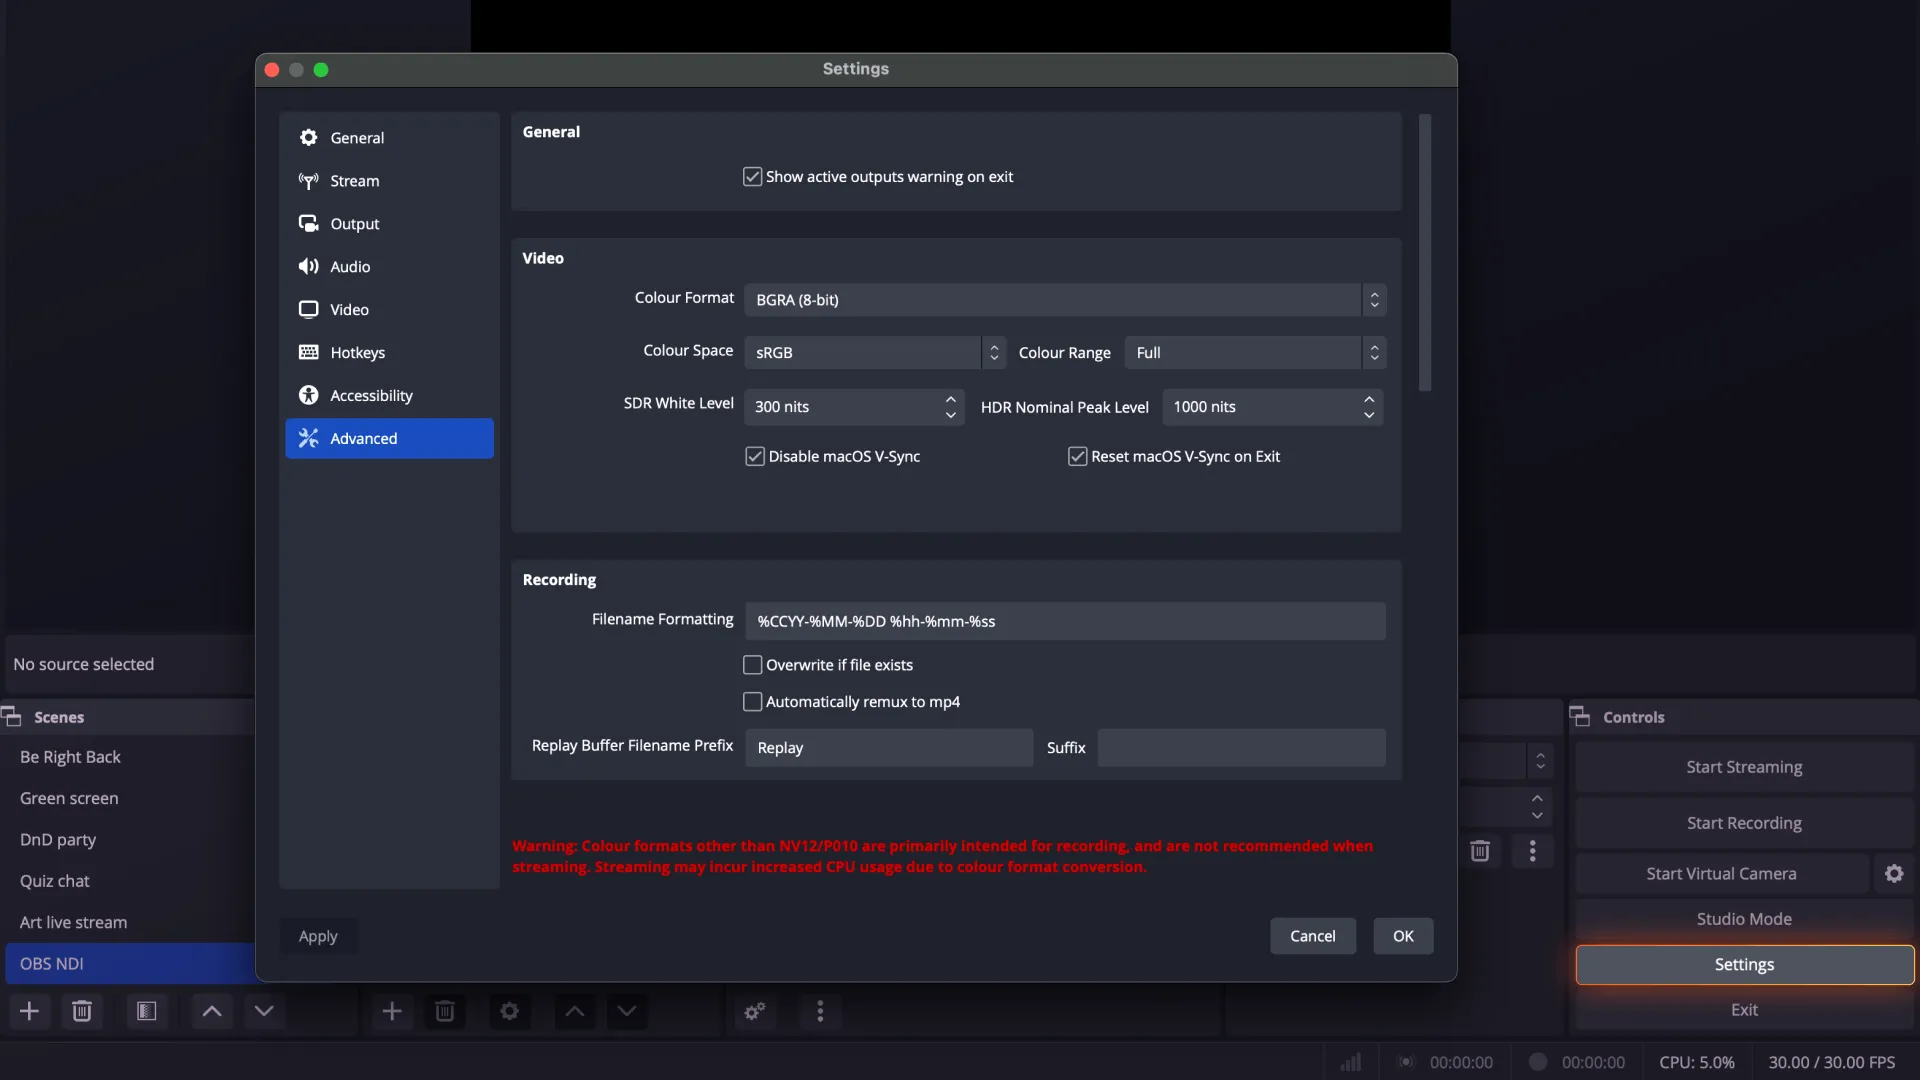
2. In the Controls panel, click on Settings, then click on Advanced in the side menu.
3. Under the Video category, make sure that the settings are set to the following by selecting from the dropdown pop-up menus for each value.

Remember to click “OK” to save your changes.
Note: BGRA is a color format that includes alpha. You might see a warning after selecting these options, but you can disregard the message for the purpose of generating your NDI feed.
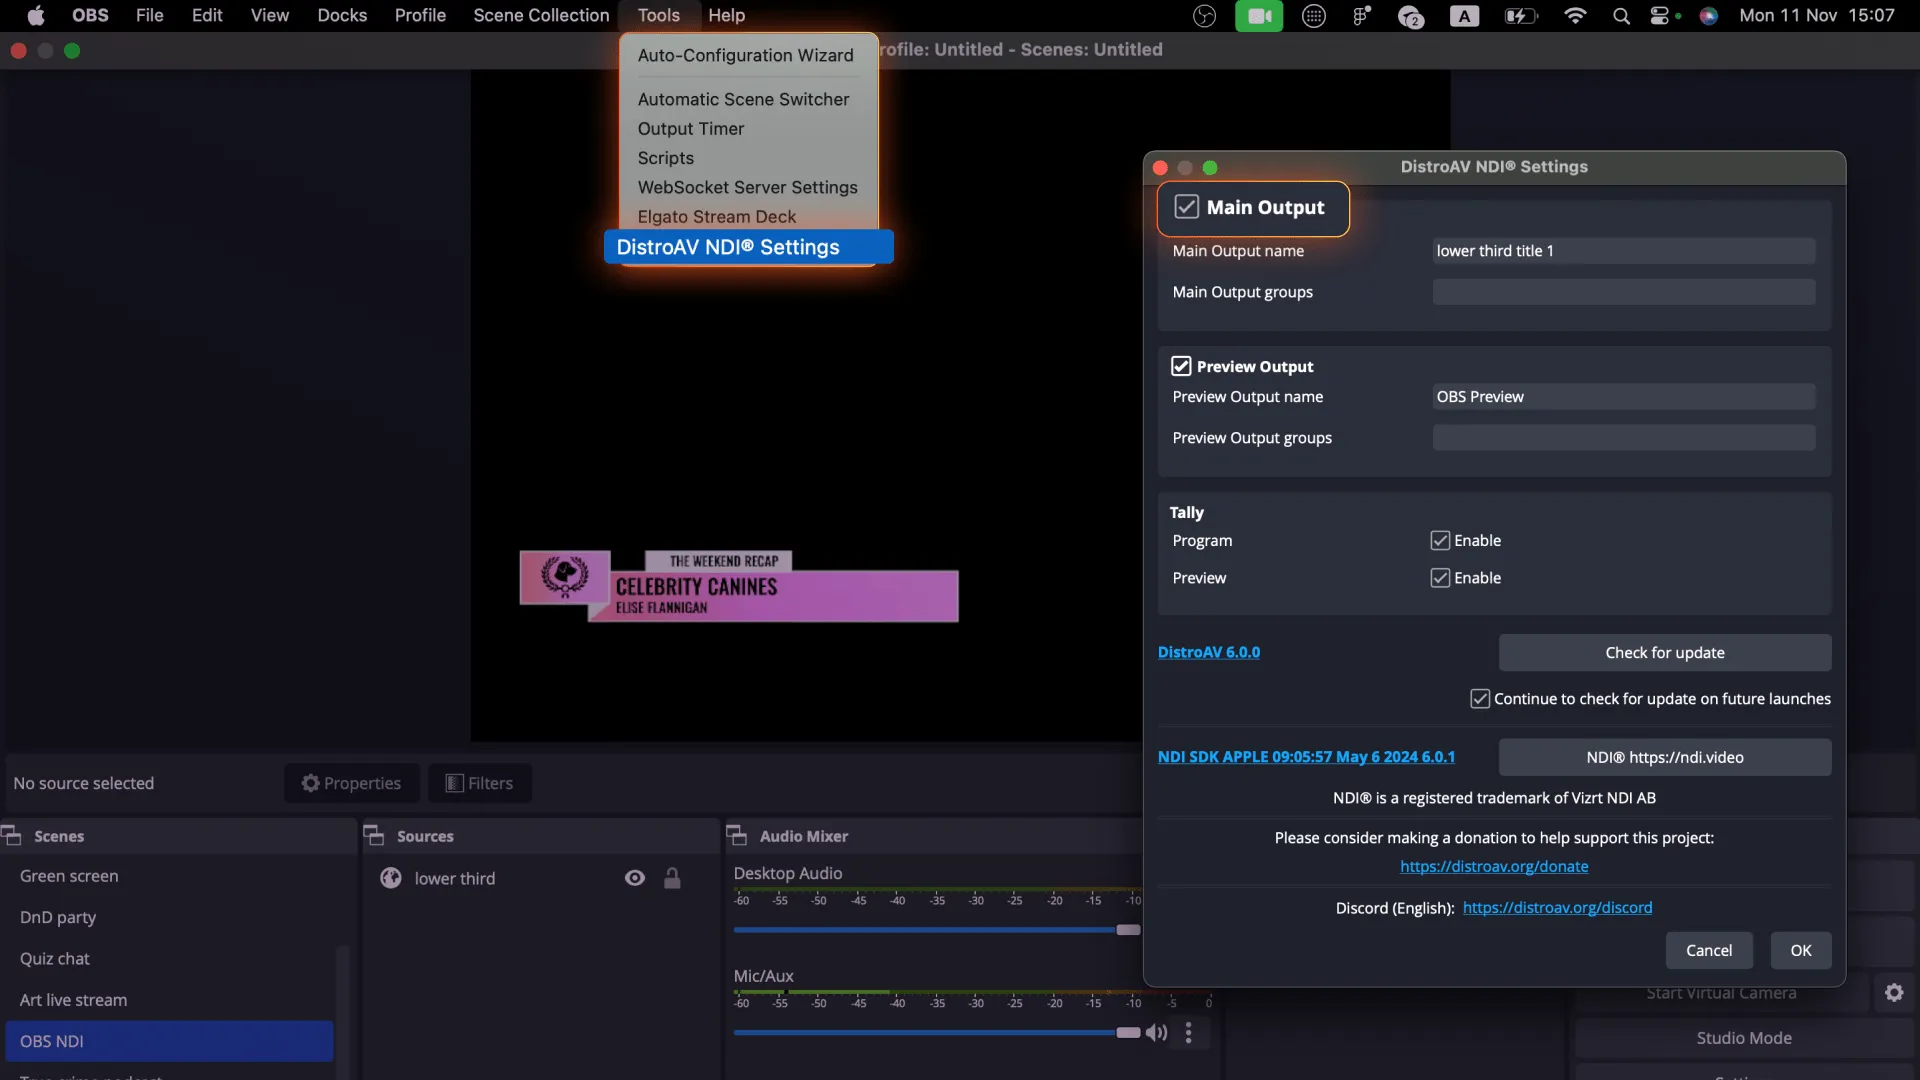
4. In the menu banner at the top of your window, click on Tools and select “DistroAV NDIⓇ Settings”.
5. Click the Main Output checkbox. You can also change the default name or change it to something you’ll remember.

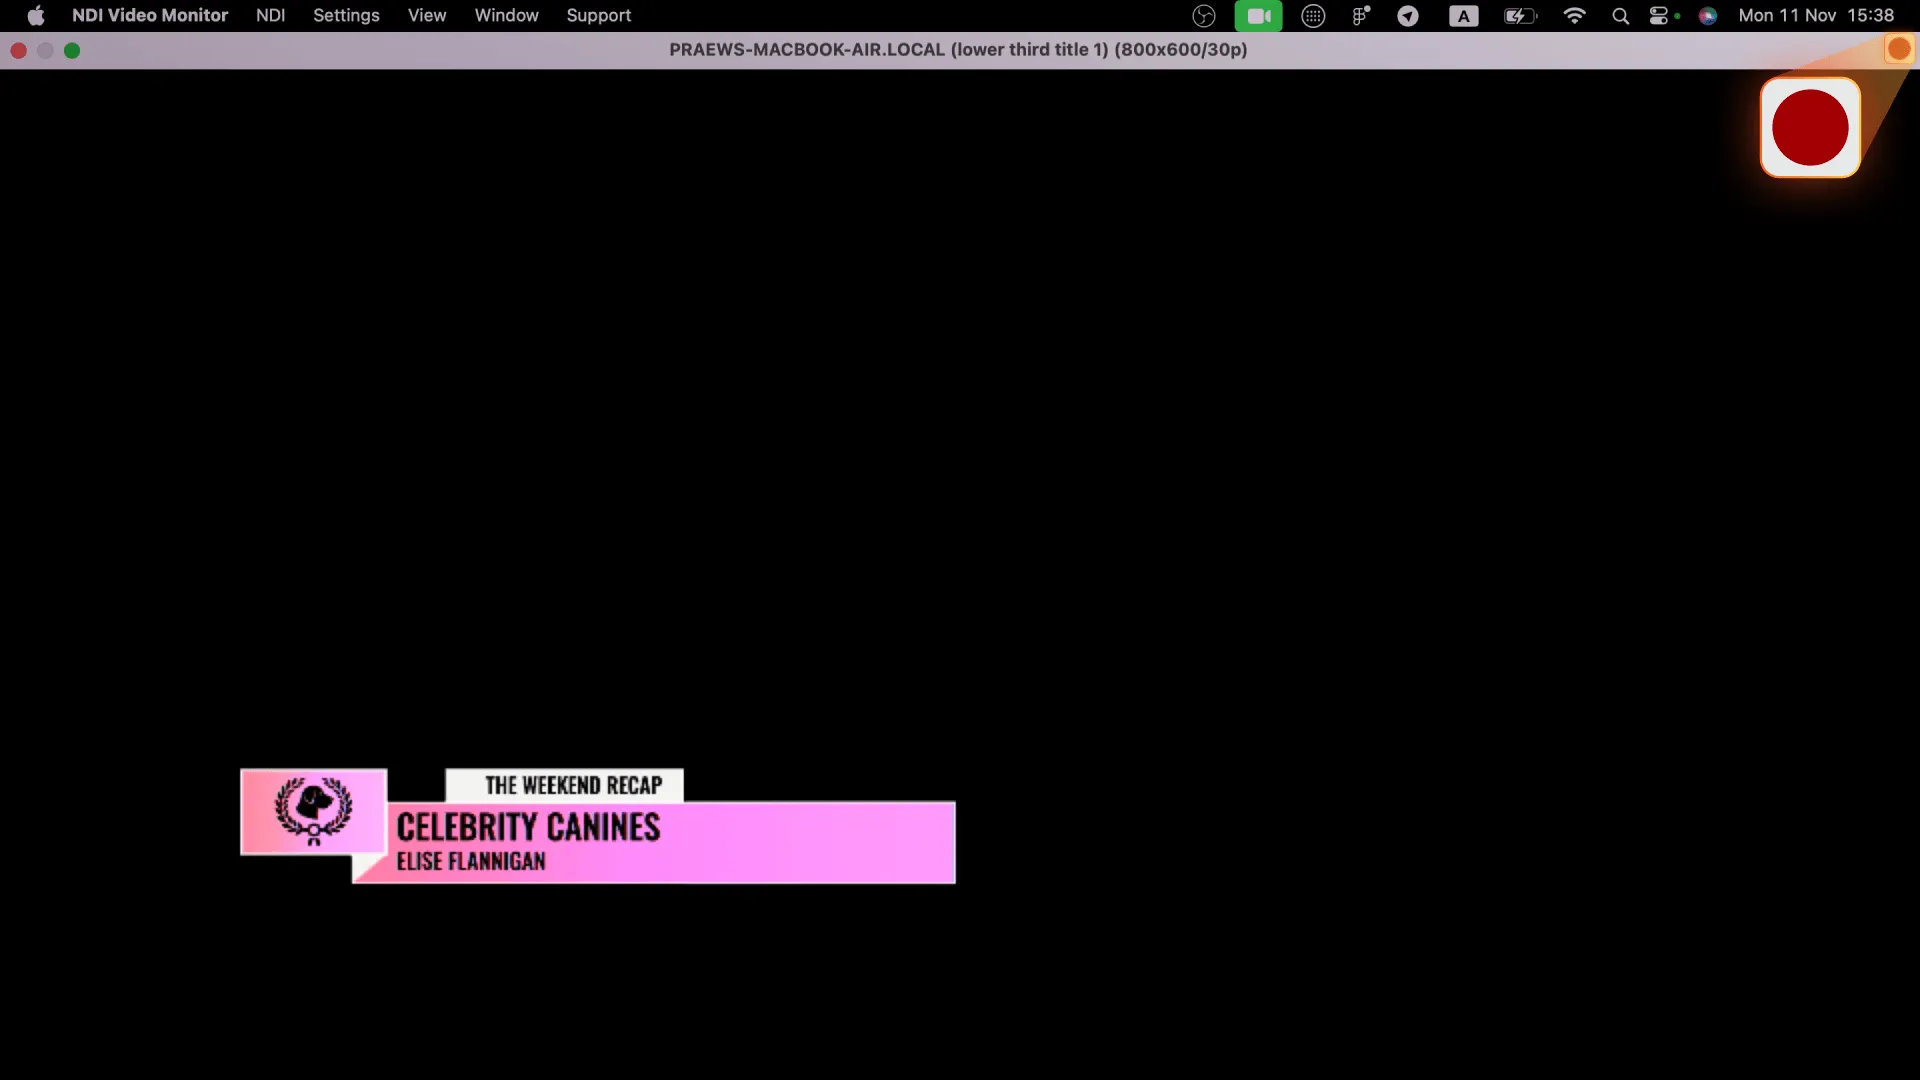
1. Open NDI Video Monitor and select the NDI feed by clicking on NDI in the top menu, clicking your device name, and then selecting the active OBS feed you named earlier.

You should now see the uno overlay from the OBS NDI feed appear inside the NDI video monitor frame.
2. Hit the record button in the top right corner of the video frame. Operate all the graphic overlays you want to use in post production while recording. Make sure to end the recording when you have what you need.

Once your recording is complete, deactivate the NDI feed by going back to OBS Studio and clicking on Tools in the top menu. Uncheck the Main Output and Preview Output boxes, then click “OK” to save your settings.
You can now easily drop your .MOV recording into your Adobe editing software to clip and edit.
Note: If you can’t find your video file, double check, or change your NDI Video Monitor recording path by clicking on Settings in the top menu, and selecting “Set Record Path”.

Make sure that your video editing software Settings allow you to view the transparency grid, so you can check if the transparent aspects of your output have been retained.
If you’re experiencing difficulties recording an uno overlay with NDI Tools for Mac, the uno team is here to help! Join our Discord channel and just drop us a message on the #support channel. We’ll get right back to you shortly.