Resources
If you’ve created an uno overlay from scratch through Singular, or if you’re using overlays.uno with more complex broadcasts, Bitfocus Companion can help add functionality to your Stream Deck setup. Here’s our Bitfocus Companion manual for using the Singular Platform REST API v2 with the Singular App.
You can do a lot with the Elgato Stream Deck, however it isn’t without its limitations for more complex live streaming – especially when you have to control a lot of equipment. That’s why Bitfocus Companion app for Stream Deck is an incredibly useful tool for pro streamers and content creators.
Bitfocus Companion turns a Stream Deck into a professional switchboard that can run on any device – even separate from your Stream Deck surface – and lets people trigger preconfigured actions.
1. Download the latest version of Bitfocus Companion and install it on your PC.
Note: if you are working on MacOS, you may have to bypass some additional security warnings. We suggest you right-click on the Companion DMG file and click Open.
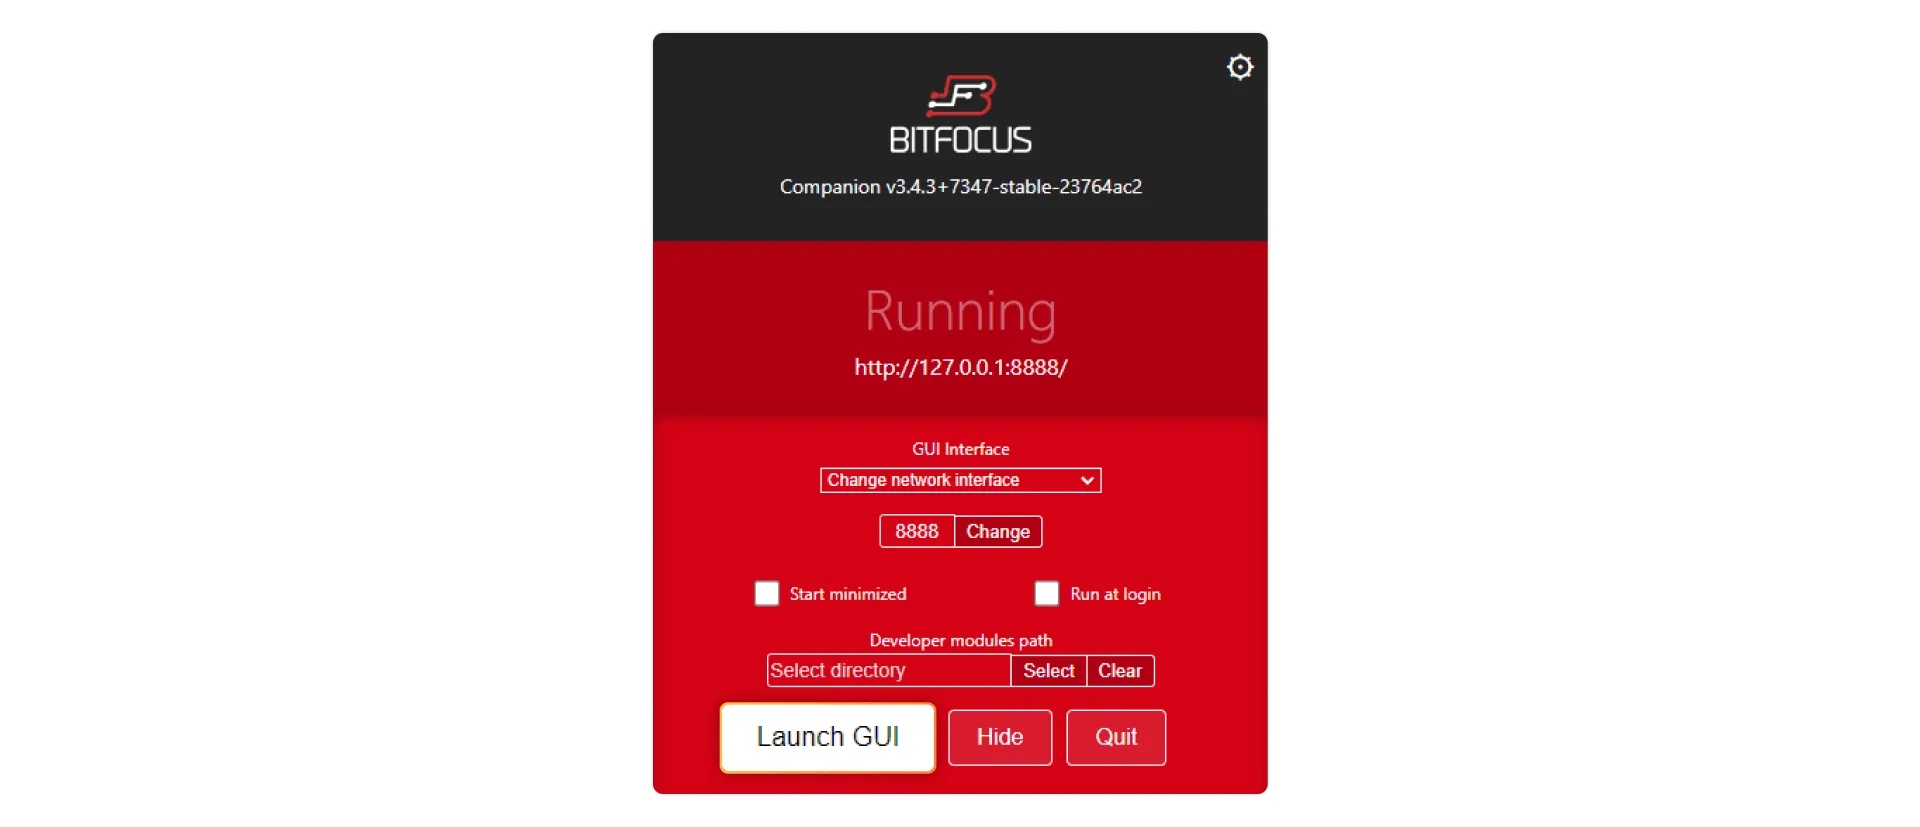
2. A small control window should open. Click the “Launch GUI” button.
Now you can set up the REST API by adding the Generic HTTP Requests Connection.
3. Make sure you are in the Connections tab in Bitfocus Companion. Under the +Add Connection tab, type Generic HTTP into the search bar. Then, click the “Add” button.

4. Configure the connection and make sure the Label is something you’ll recognize later.

Note: You can leave the Base URL field empty for now. You can define REST endpoints later when you define buttons.
4. The Singular-API connection should appear under your Connections tab. Enable the HTTPS connector by clicking on the toggle next to the Singular-API connection.

Our parent company, Singular.Live, has a full introduction to REST API v2 to help you get familiarized with its uses. You can also learn more about using the Singular REST API by reviewing these how-to guides.
All Singular API v2 calls for sending payloads and triggering animations use the PATCH HTTP method.
In this guide, we’re using the Pyrite-themed Stream Pack.
However, if you’re just starting out and want to test this tutorial out first, you can also use these URLs for testing:
If you’re using the Singular App, this is how you can find the API URL:
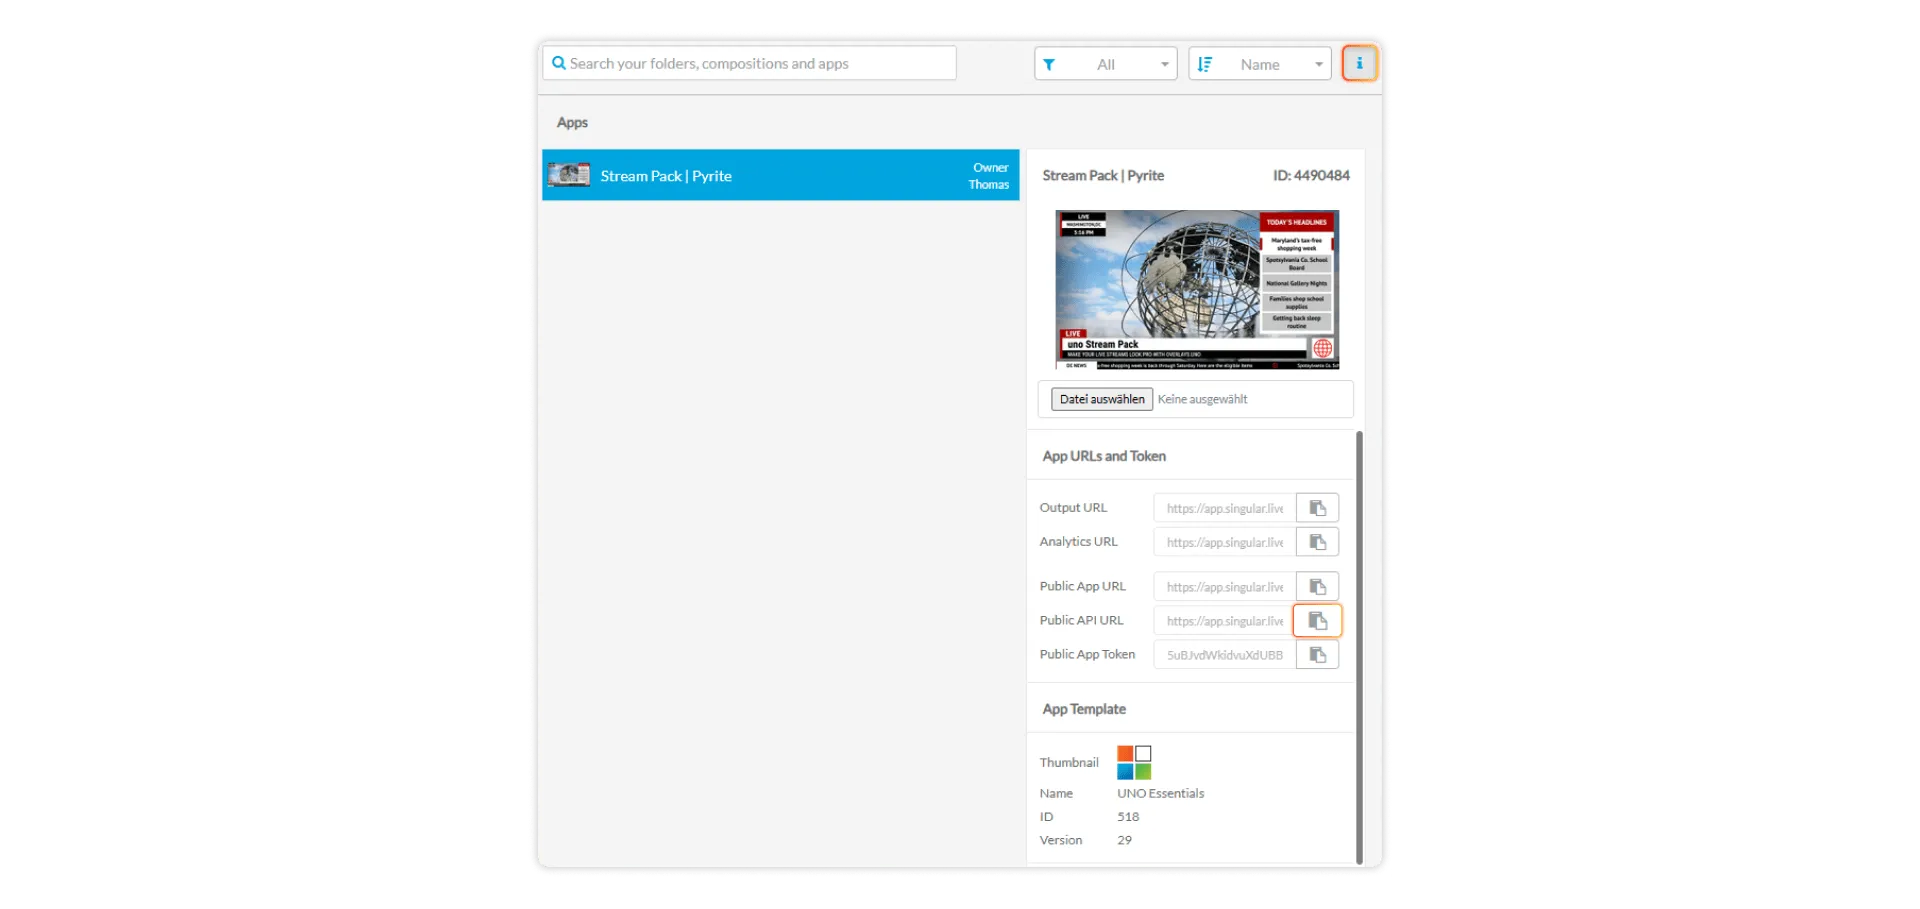
Compositions define which element of the uno overlay you want to perform an action. By pasting the Public API URL into your browser, you will reveal a JSON structure containing the subcompositions and control nodes you need.

Here are some examples of how you might build the REST API request body in JSON to trigger different actions in the overlay:
[
    {
        "subCompositionName": "Talking Points",
        "payload": {
            "rowActive": 1
        }
    }
]
[
    {
        "subCompositionName": "Talking Points",
        "state": "In"
    }
][
{
"subCompositionName": "Talking Points",
"state": "Out"
}
]Here’s how you can add buttons to do the following:
1. Click on Buttons in the top menu tab to navigate to your buttons, then click on a square in the panel to select and edit a button.
2. Open the Action Browser by clicking on the file icon under “Press Actions”.
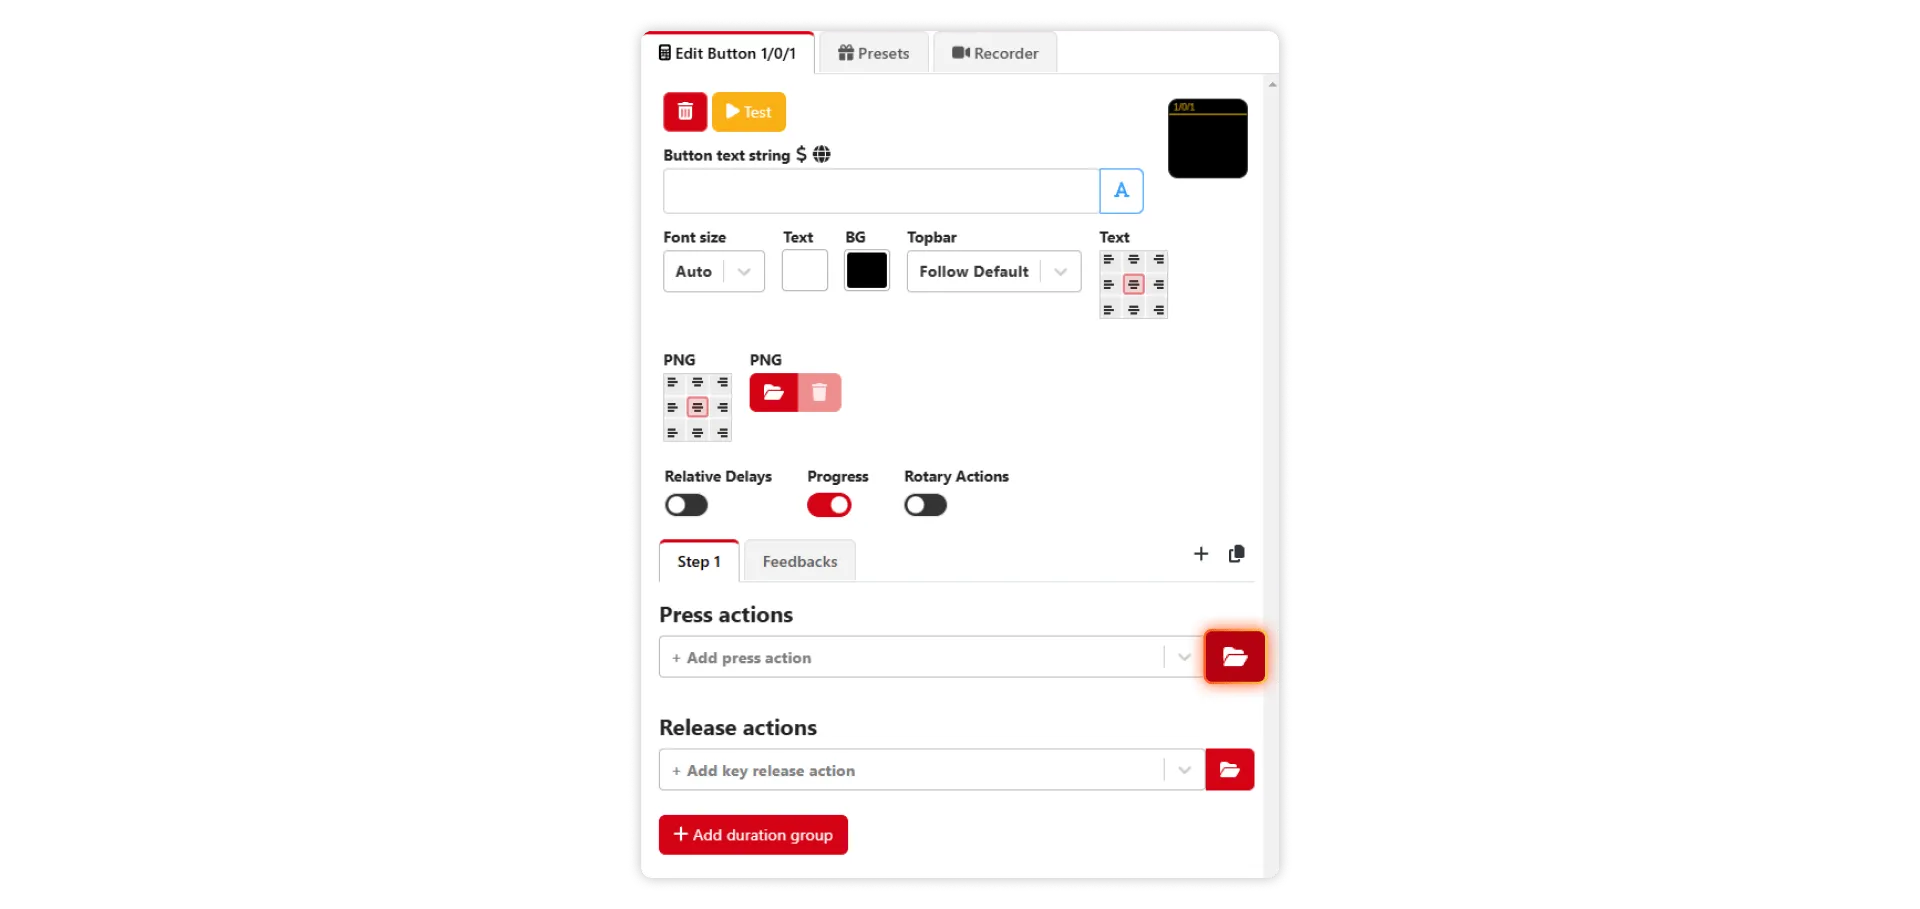
3. Select PATCH method from the dropdown menu.

4. Define the PATCH request.
5. Add a button to animate the talking points out by repeating steps 1-3 in this section, then defining the PATCH request with the following:

6. Add a button to highlight the next row of the talking points by repeating steps 1 and 2 in this section, then defining the PATCH request with the following:
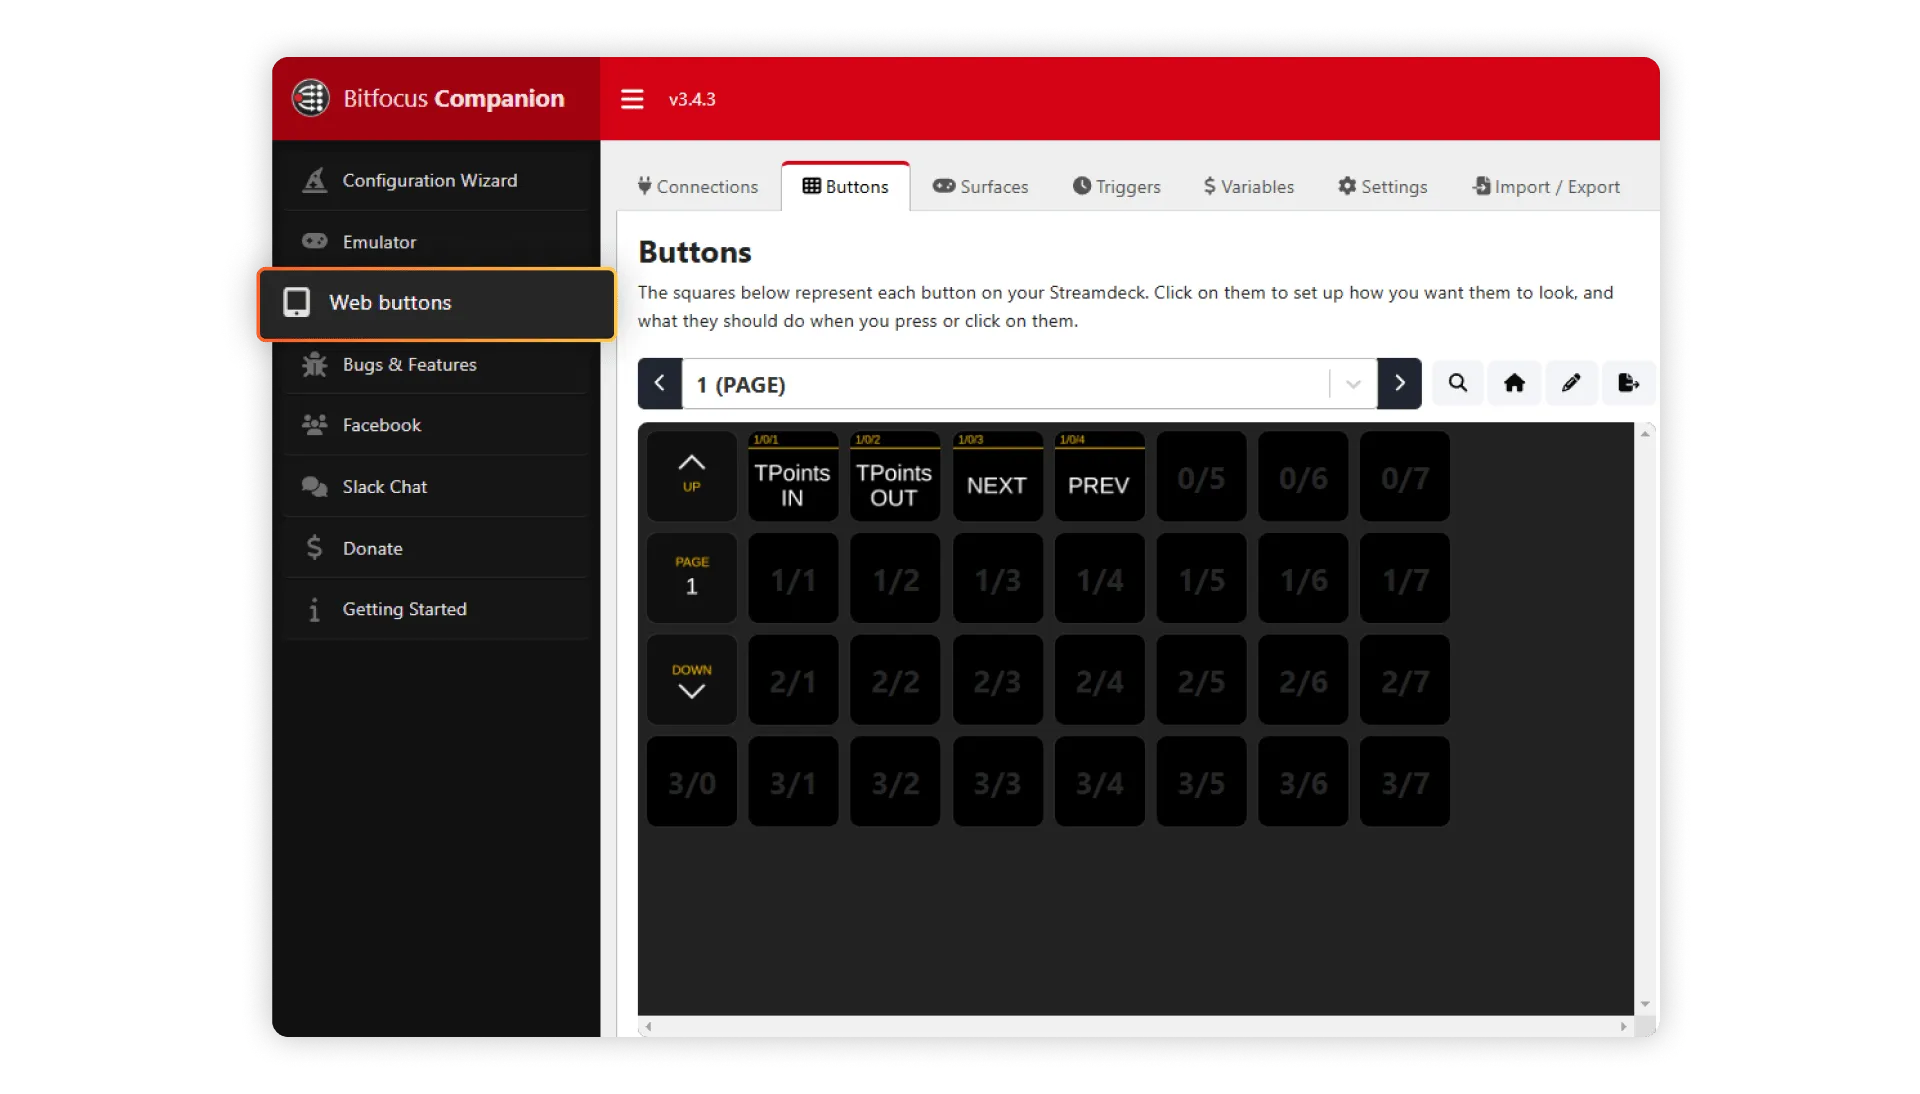
You can check if your setup works properly by clicking on the Web buttons view the menu on the left of your screen.
If you have any questions, or if you get stuck using this Bitfocus Companion manual, feel free to reach out to the uno team on our discord channel. You can also check out our guides on how to integrate the uno App API and how to use Companion to swap between uno slots.

